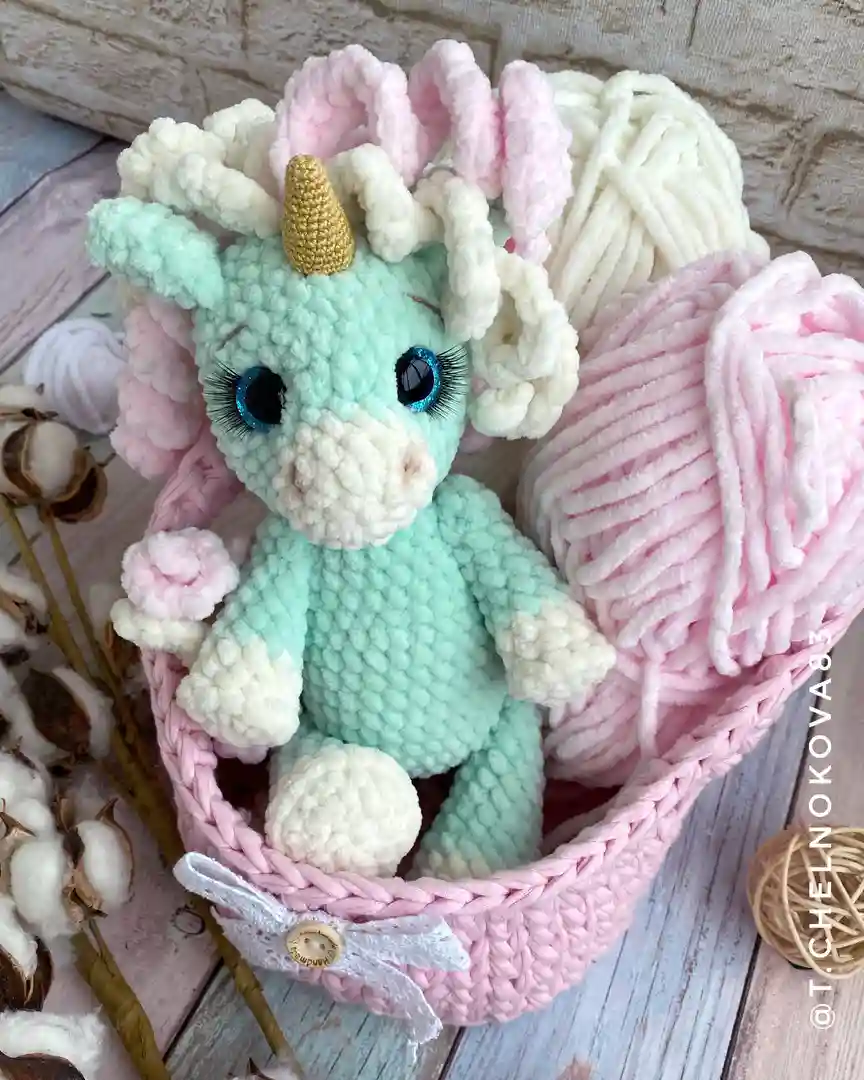

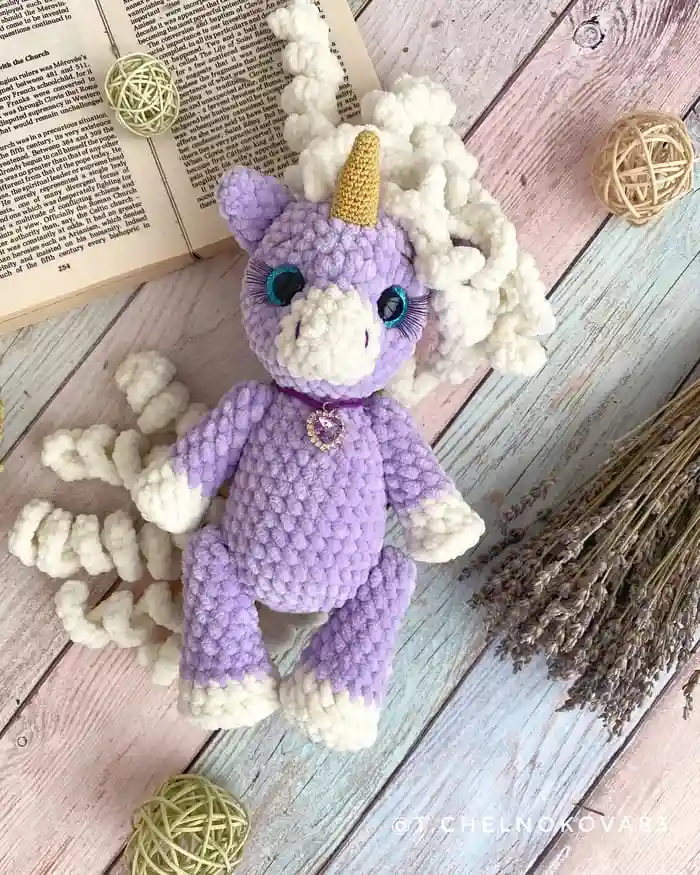
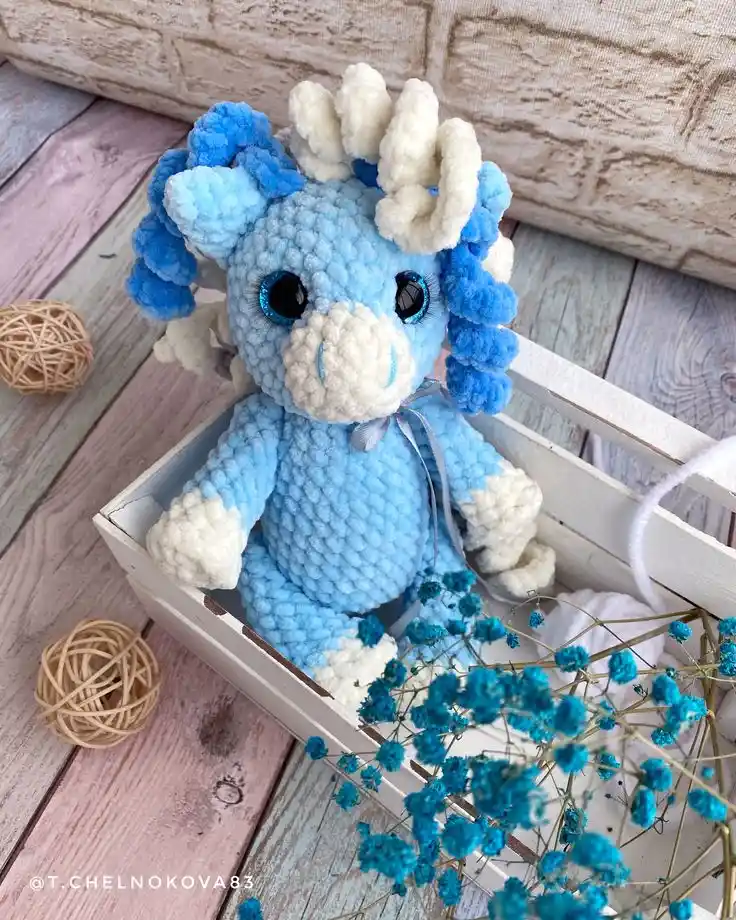
Free Masterclass: How to Crochet a Marshmallow Unicorn by Tatiana Chelnokova (@mymagicbox17)
In this free masterclass, you’ll learn how to crochet a beautiful plush unicorn using amigurumi techniques. This adorable marshmallow unicorn can be made with any plush yarn like YarnArt Dolce or Himalaya Dolphin Baby (120m / 100g). Approximate material consumption is about 50-60g of the main color and 20-30g of additional colors.
The finished size of the toy is approximately 21 cm.
Materials and Tools
- Plush Yarn: Main color (50-60g) and an additional color (20-30g)
- Cotton Yarn: For embroidering the face and making the nose (e.g., PNK im. Kirova Iris or Seam Anna 16)
- Crochet Hook: 4-5 mm
- Toy Eyes: 14-16 mm
- Doll Eyelashes
- Toy Filling
- 4 Buttons (13-15 mm) for button jointing
- Plastic joints: 20 mm
- Needle for sewing details
- Scissors
Abbreviations
- KA – Magic ring
- ch – Chain stitch
- sl st – Slip stitch
- sc – Single crochet
- psc – Puff stitch (relief stitch)
- inc – Increase
- dec – Decrease
- (…) x n – Repeat n times
Crochet Pattern for the Marshmallow Unicorn
Back Legs (2 pieces)
Yarn Color: White
- Round 1: 6 ch in a magic ring (6)
- Round 2: Inc in each st (12)
- Round 3: (1 sc, inc) x 6 (18)
- Round 4: Crochet relief back single crochets to form the hoof: ch for the rise, (4 psc, dec) x 3 (15)
- Round 5: 15 sc (15)
- Round 6: 15 sc (15)
- Round 7: (3 sc, dec) x 3 (12)
- Round 8: 12 sc (12)
- Round 9: (4 sc, dec) x 2 (10)
- Round 10–14: 10 sc (5 rounds)
Stuff the leg with filling almost completely. If you are using washers for limb attachment, install them between rounds 13 and 14. Position the washers so that after attaching the leg to the body, the connection point is at the back.
- Round 15: Dec x 5 (5)
Pull the hole tight, secure the yarn, and hide the ends inside.
Front Legs (Arms) (2 pieces)
Yarn Color: White
- Round 1: 6 ch in a magic ring (6)
- Round 2: Inc in each st (12)
- Round 3: Crochet relief back single crochets for the hoof: (2 psc, dec) x 3 (9)
- Round 4-5: 9 sc (2 rounds)
- Round 6-12: 9 sc (7 rounds)
Stuff the arm with filling almost completely. If you are using washers for limb attachment, install them between rounds 11 and 12.
- Round 13: Dec x 5 (5)
Pull the hole tight, secure the yarn, and hide the ends inside.
Body
Yarn Color: Main color
- Round 1: 6 ch in a magic ring (6)
- Round 2: Inc in each st (12)
- Round 3: (1 sc, inc) x 6 (18)
- Round 4: (2 sc, inc) x 6 (24)
- Round 5: (3 sc, inc) x 6 (30)
- Round 6–11: 30 sc (6 rounds)
- Round 12: 4 sc, 3 dec, 20 sc (27)
If you are using washers for limb attachment, attach the back legs between rounds 5 and 6 of the body, symmetrically, using the 3 decreases from round 12 as guides for placement.
- Round 13: 3 sc, dec, sc, dec, 10 sc, dec, 7 sc (24)
- Round 14: 24 sc (24)
- Round 15: 5 sc, dec, 6 sc, dec, 6 sc, dec, sc (21)
- Round 16: 4 sc, dec, 5 sc, dec, 5 sc, dec, sc (18) Stuff the body halfway.
- Round 17: (4 sc, dec) x 3 (15)
- Round 18: 4 sc, dec, 4 sc, dec, 2 sc, dec, 3 sc (12)
- Round 19: Dec x 6 (6)
Pull the hole tight, secure the yarn, and hide the ends inside.
Head
Yarn Color: White
- Round 1: 6 ch in a magic ring (6)
- Round 2: Inc in each st (12)
- Round 3: (3 sc, inc) x 3 (15)
- Round 4: 15 sc (15)
- Round 5: (4 sc, inc) x 3 (18)
- Round 6: 2 sc, inc, 4 sc, 4 inc from puff stitch, 4 sc, inc, 2 sc (24)
- Round 7: 4 sc, (inc, 2 sc) x 5, inc, 4 sc (30)
- Round 8: (4 sc, inc) x 6 (36)
- Round 9–14: 36 sc (6 rounds)
Install the eyes between rounds 6 and 7 so that the distance between the outer edges of the eyes is 6-8 sc (the distance between the pupils is 10-12 sc). If the eye attachments are tight, create a face indent by pulling the yarn through the area near the nose. You can learn how to do this in the “Assembling the Toy” section.
Ears (2 pieces)
Yarn Color: Main color
- Round 1: 4 ch in a magic ring (4)
- Round 2: (1 sc, inc) x 2 (6)
- Round 3: (2 sc, inc) x 2 (8)
- Round 4: (3 sc, inc) x 2 (10)
- Round 5: (3 sc, dec) x 2 (8)
For larger ears:
- Round 1: 4 ch in a magic ring (4)
- Round 2: (1 sc, inc) x 2 (6)
- Round 3: (2 sc, inc) x 2 (8)
- Round 4: (3 sc, inc) x 2 (10)
- Round 5: 10 sc (10)
- Round 6: (3 sc, dec) x 2 (8)
Secure the yarn, hide the ends inside the ear. I recommend sewing the ears onto the head using cotton thread.
Horn
Yarn Color: Cotton yarn of a suitable color
- Round 1: 6 ch in a magic ring (6)
- Round 2: (1 sc, inc) x 3 (9)
- Round 3: 9 sc (9)
- Round 4: (2 sc, inc) x 3 (12)
- Round 5: 12 sc (12)
- Round 6: (3 sc, inc) x 3 (15)
- Round 7–8: 15 sc (2 rounds)
- Round 9: (4 sc, inc) x 3 (18)
- Round 10–11: 18 sc (2 rounds)
- Round 12: (5 sc, inc) x 3 (21)
- Round 13–14: 21 sc (2 rounds)
Close the round with a sl st, secure the yarn, and leave a tail for sewing the horn onto the head. Stuff the horn with filling.
Mane (10-12 pieces)
Yarn Color: Additional colors
- Make a chain of 25-26 ch. Starting from the second ch from the hook, crochet 2 sc in each ch. Secure the yarn.
- Arrange the pieces on the head along the mane line (2-3 pieces per row). It’s best to attach the mane after the head is sewn onto the body.
Tail (5 pieces)
Yarn Color: Additional colors
- Make a chain of 35 ch. Starting from the second ch from the hook, crochet 2 sc in each ch. Secure the yarn.
Assembling the Unicorn
**Step
1**: Attach the head to the body. Using a long thread, sew the head onto the neck area. Be sure to leave space for the tail attachment.
Step 2: Attach the ears symmetrically to the sides of the head.
Step 3: Attach the horn to the forehead, between the eyes.
Step 4: Attach the tail to the back of the body.
Step 5: Position the mane along the back of the head and body, then sew it into place.
Finishing Touches
- Embroider the eyes, nose, and mouth.
- Add details like eyelashes and cheeks.
- Once everything is attached securely, give your unicorn a final shaping!
This fun and detailed pattern will help you crochet a magical marshmallow unicorn that’s perfect for any collection! Don’t forget to share your results on social media and tag @mymagicbox17.