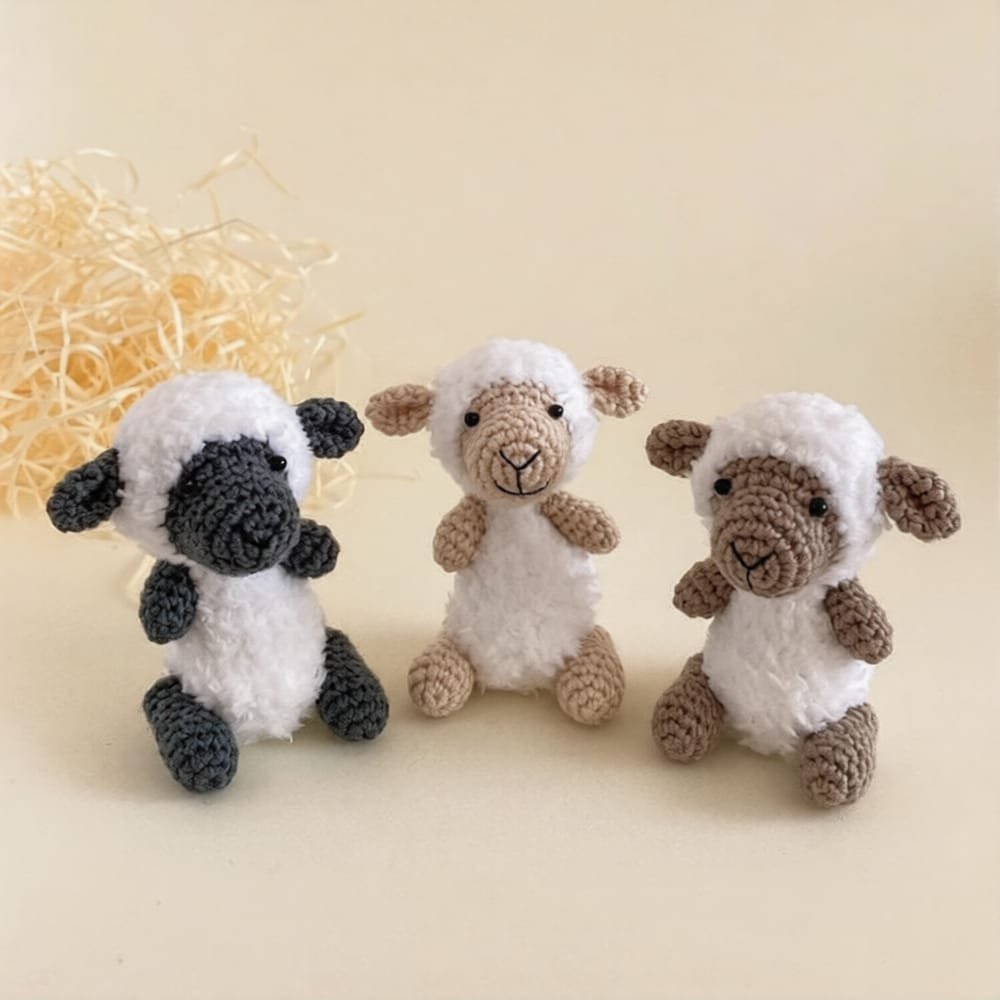
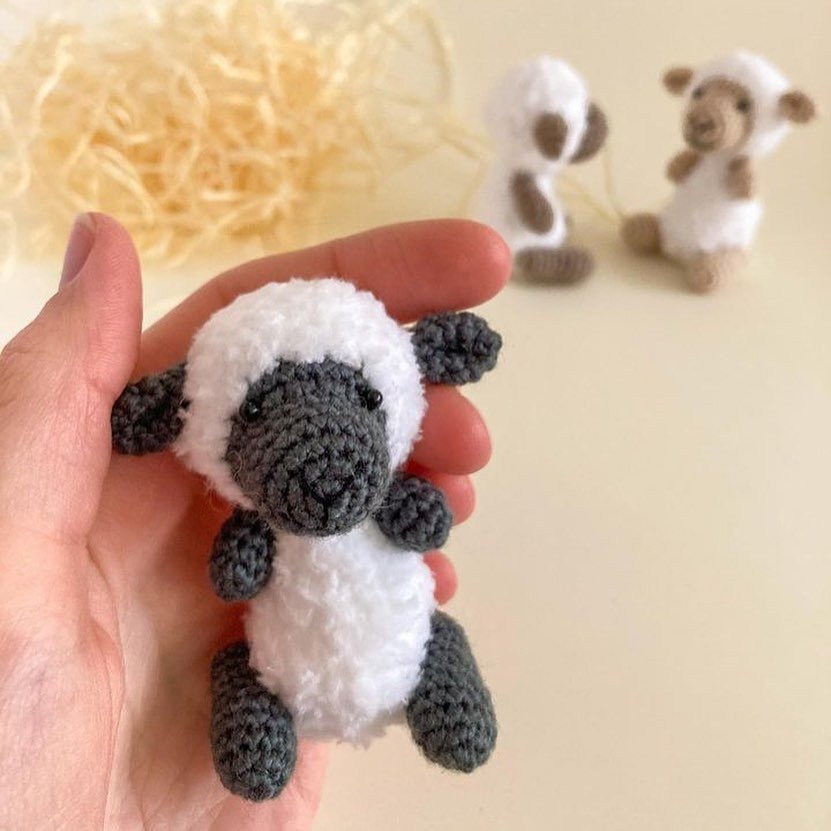
Free Crochet Masterclass: Little Sheep by @scandistyle_dolls
In this masterclass, you will learn how to crochet a small sheep using the amigurumi technique. For this project, any fluffy yarn will work well, such as Alize Softy, Adelia Sofia, YarnArt Mink, and others.
Experience with fluffy yarn is required.
Finished size: approximately 8 cm.
Materials and Tools Needed
- Yarn: Beige and fluffy white yarn
- Crochet hook
- Safety eyes (3 mm)
- Toy stuffing
- Glue
- Pins
- Needle for sewing details
- Scissors
Abbreviations
- KA – Magic ring (Amigurumi ring)
- ch – Chain stitch
- sc – Single crochet
- dec – Decrease
- inc – Increase
- (…) x n – Repeat n times
Crochet Pattern for Little Sheep
Head
Start with beige yarn.
- Rnd 1: 6 sc in KA
- Rnd 2: inc x 6 (12)
- Rnd 3: (1 sc, inc) x 6 (18)
4–6. Rnd 4–6: 18 sc (3 rounds) - Rnd 7: 7 sc, inc x 4, 7 sc (22)
- Rnd 8: 7 sc, inc, 6 sc, inc, 7 sc (24)
Switch to fluffy white yarn. - Rnd 9: (3 sc, inc) x 6 (30)
10–12. Rnd 10–12: 30 sc (3 rounds) - Rnd 13: (3 sc, dec) x 6 (24)
- Rnd 14: (2 sc, dec) x 6 (18)
Stuff the head. - Rnd 15: (1 sc, dec) x 6 (12)
- Rnd 16: 6 dec
Fasten off the yarn, cut, and hide the end inside.
Ears (Make 2)
Use beige yarn.
- Rnd 1: 6 sc in KA
- Rnd 2: (1 sc, inc) x 3 (9)
- Rnd 3: (2 sc, inc) x 3 (12)
- Rnd 4: 12 sc
- Rnd 5: (2 sc, dec) x 3 (9)
Fold the edges and sew them together. Leave a tail for sewing.
Arms (Make 2)
Use beige yarn.
- Rnd 1: 6 sc in KA
- Rnd 2: (1 sc, inc) x 3 (9)
3–4. Rnd 3–4: 9 sc (2 rounds) - Rnd 5: (1 sc, dec) x 3 (6)
6–7. Rnd 6–7: 6 sc (2 rounds)
Stuff the arms. Tighten the opening, fasten off the yarn, and hide the end inside.
Body
Use fluffy white yarn.
- Rnd 1: 6 sc in KA
- Rnd 2: inc x 6 (12)
- Rnd 3: (1 sc, inc) x 6 (18)
- Rnd 4: (2 sc, inc) x 6 (24)
5–7. Rnd 5–7: 24 sc (3 rounds) - Rnd 8: 6 dec, (1 sc, dec) x 4 (14)
9–11. Rnd 9–11: 14 sc (3 rounds) - Rnd 12: (5 sc, dec) x 2 (12)
- Rnd 13: 12 sc
Leave a tail for sewing. Stuff the body.
Tail
Use fluffy white yarn.
Crochet 5 sc in KA, tighten the ring. Leave a tail for sewing.
Legs (Make 2)
Use beige yarn.
- Rnd 1: 6 sc in KA
- Rnd 2: inc x 6 (12)
3–5. Rnd 3–5: 12 sc (3 rounds) - Rnd 6: (2 sc, dec) x 3 (9)
7–10. Rnd 7–10: 9 sc (4 rounds)
Stuff the legs. Tighten the opening, fasten off the yarn, and hide the end inside. Crochet 5 sc in KA for the feet, tighten the ring. Leave a tail for sewing.
Assembly of the Toy
- Sew the ears: Attach the ears to the sides of the head (rows may vary, adjust as needed).
- Attach the eyes: Glue the safety eyes between rows 6 and 7 of the head, on both sides of the increases made in row 7.
- Embroider the nose and mouth: Use a fine black thread to embroider the nose between rows 1–2 and the mouth between rows 3–4. Embroider a small vertical line from the nose to the mouth.
- Attach the head to the body: Sew the head securely to the body.
- Position the arms: Attach the arms just below the seam where the head meets the body (about 1 row lower). You can either sew them or use a strong thread to attach them.
- Attach the legs: Sew the legs to the body, between rows 4 and 5, on both sides.
- Sew the tail: Attach the tail to the back of the body, approximately at rows 5–6.
Your cute little sheep is now complete and ready to be displayed! Enjoy your handmade creation!