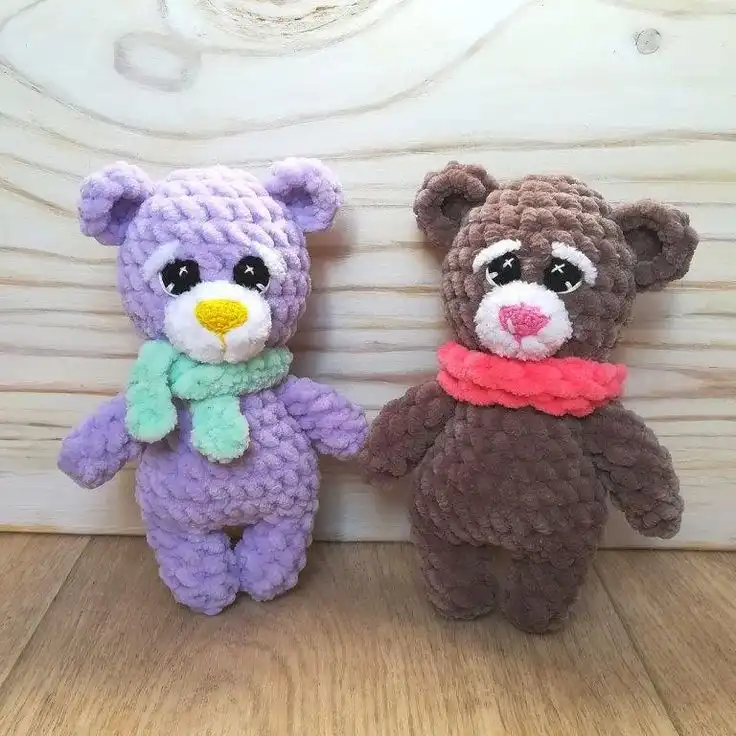
Mini Bear Amigurumi Crochet Pattern
Author: Natalia Lebedeva
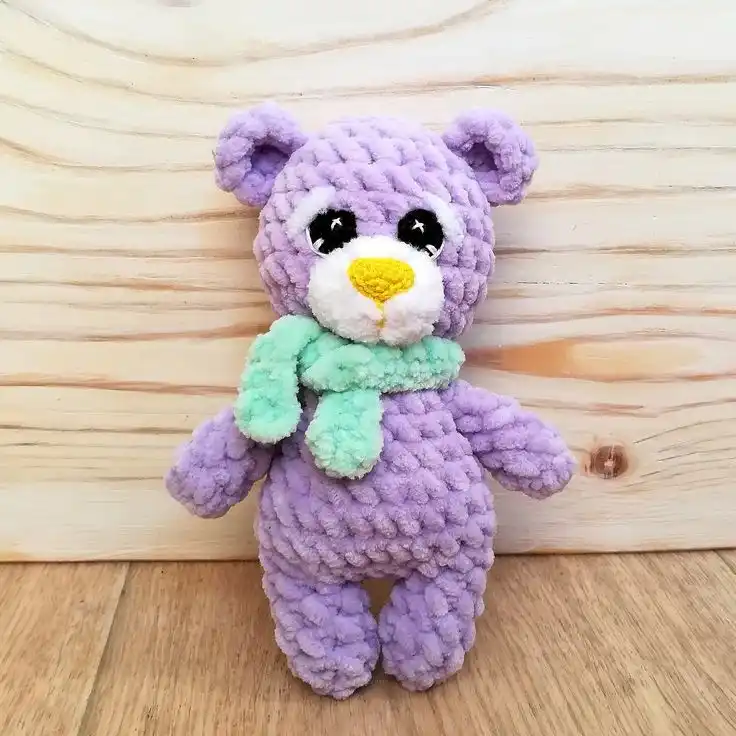
This mini bear is a pocket-sized toy, perfect for little ones to carry with them everywhere. The pattern uses minimal yarn and results in a 15 cm tall bear. Below is the crochet pattern to make this adorable amigurumi bear.
Please credit the author, Natalia Lebedeva, if you share a photo of your creation!
Materials Needed:
- Less than half a skein of plush yarn (YarnArt Dolce is recommended by the author)
- White yarn (Alize Softee) for the snout
- Vita Coco or Iris yarn for the eyes and attaching parts
- Crochet hooks: 4.5 mm for plush yarn, 1.2 mm for Vita Coco yarn
- Tapestry needle for sewing
- Stitch marker
- Scissors
- Stuffing (Hollofiber)
Abbreviations:
- sc – single crochet
- inc – increase
- dec – decrease
- mr – magic ring
Head and Body (Crocheted as one piece)
Start crocheting from the head:
- 6 sc in a magic ring (6)
- 6 inc (12)
- (1 sc, inc) x 6 (18)
- (2 sc, inc) x 6 (24)
5-8. 24 sc (4 rows) - (2 sc, dec) x 6 (18)
- (1 sc, dec) x 6 (12)
- 12 sc, stuff the head with filling
- (1 sc, inc) x 6 (18)
13-15. 18 sc (3 rows) - (2 sc, inc) x 6 (24)
17-18. 24 sc (2 rows) - (2 sc, dec) x 6 (18)
Now, continue crocheting the legs without cutting the yarn.
Legs (Crocheted in the round):
- First Leg:
- Crochet 7 sc, place a stitch marker at the first stitch. Then crochet the 8th stitch in the first stitch (where the marker is), which will mark the start of the second round.
- Crochet 4 more rows of 7 sc.
- Start decreasing, close the leg, and cut the yarn. You’ll have a total of 20-23 rows of 7 sc.
- Second Leg:
- From the first leg, leave 2 stitches between and crochet the second leg in the same way as the first leg.
- Between the two legs, stuff the toy and continue crocheting.
Arms:
- 6 sc in a magic ring (6)
2-5. 6 sc (4 rows)
- Slightly stuff the arms, fold in half, and crochet 2 sc through both loops.
- Fasten off the yarn and hide the end.
Snout (Crocheted with Softee yarn, doubled):
- 6 sc in a magic ring (6)
- 6 inc (12)
- 12 sc, cut the yarn.
Eyes (Crocheted with black Vita Coco or Iris yarn):
- 6 sc in a magic ring (6)
- 6 inc, leave a long tail for sewing.
Ears:
- 6 sc in a magic ring (6)
- (1 sc, inc) x 3 (9)
Tail (Crocheted with white Softee yarn, doubled):
- 4 sc in a magic ring (4)
- 4 inc (8)
- 4 dec (4)
Nose:
Crochet the nose using Vita Coco or Iris yarn in single crochet stitches, according to the provided pattern. The author recommends making 3 rows.
Assembly of the Bear:
- Sew the snout to the face, and then attach the nose to the snout.
- Attach the eyes, then use white yarn to embroider a highlight on the eyes. Optionally, embroider eyelids with plush or Softee yarn.
- Sew the ears under the second row of the head.
- Attach the arms and tail to the body.
- Your mini bear is now complete!
Enjoy your sweet, pocket-sized bear!