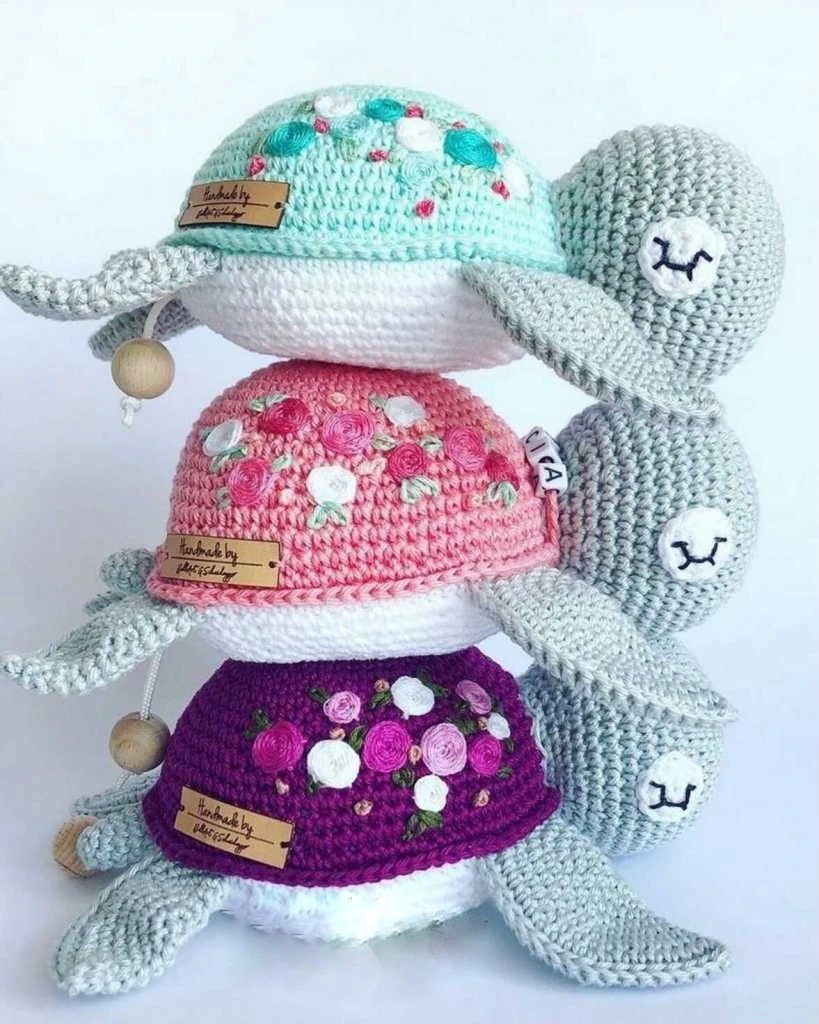
The Amigurumi Sweet Turtle is a delightful crochet project featuring a cute turtle with a detailed body and accessories. Here’s a recap of the pattern, including all the necessary components for making the turtle:
Materials:
- 3.5 mm crochet hook (US E hook)
- Needle
- Stuffing
- Scissors
Abbreviations:
- st = stitch
- sc = single crochet
- ch = chain
- sl st = slip stitch
- inc = increase
- dec = decrease
- ** = repeat instructions x times
- ( ) = number in parentheses indicates the number of stitches at the end of the round
Notes:
- Work in a continuous spiral (do not join rounds).
- Mark the start/end of each round using a stitch marker or piece of yarn.
- All stitches are worked into both loops, unless specified otherwise.
Head (Pink):
- Rnd 1: Sc 6 in a magic ring (6 sts)
- Rnd 2: Inc (12 sts)
- Rnd 3: Sc 1, Inc (18 sts)
- Rnd 4: Sc 1, Inc, Sc 2, Inc 5x, Sc 1 (24 sts)
- Rnd 5: Sc 3, Inc (30 sts)
- Rnd 6: Sc 2, Inc, Sc 4, Inc 5x, Sc 2 (36 sts)
- Rnd 7: Sc 5, Inc (42 sts)
- Rnd 8: Sc 3, Inc, Sc 6, Inc 5x, Sc 3 (48 sts)
- Rnd 9-14: Sc 1 in each stitch (48 sts)
- Rnd 15: Sc 3, Dec, Sc 6 5x, Dec, Sc 3 (42 sts)
- Rnd 16: Dec, Sc 5 (36 sts)
- Rnd 17: Sc 2, Dec, Sc 4 5x, Dec, Sc 2 (30 sts)
- Rnd 18: Dec, Sc 3 (24 sts)
- Rnd 19: Sc 5, Dec, Sc 10 1x, Dec, Sc 5 (22 sts)
- Finish with 1 sl st in the first stitch. Break yarn and leave a long end to sew the head in place.
- Stuff the head.
Eyes (Make 2):
- Rnd 1: Sc 9 in a magic ring (9 sts)
- Rnd 2: Inc (18 sts)
- Finish with 1 sl st. Break yarn and leave a long end to sew the eyes onto the head.
Front Legs (Make 2 – Pink):
- Rnd 1: Sc 6 in a magic ring (6 sts)
- Rnd 2: Inc (12 sts)
- Rnd 3: Sc 1, Inc (18 sts)
- Rnd 4: Sc 1, Inc, Sc 2, Inc 5x, Sc 1 (24 sts)
- Rnd 5: Sc 3, Inc (30 sts)
- Rnd 6: Sc 2, Inc, Sc 4, Inc 5x, Sc 2 (36 sts)
- Rnd 7: Sc 5, Inc (42 sts)
- Rnd 8: Sc 3, Inc, Sc 6, Inc 5x, Sc 3 (48 sts)
- Rnd 9: Sc 7, Inc (54 sts)
- Fold the legs into a half-circle and join the sides together with slip stitches (27 sts).
- Break yarn and leave enough yarn to sew the legs in place.
Back Legs (Make 2 – Pink):
- Rnd 1: Sc 6 in a magic ring (6 sts)
- Rnd 2: Sc 2 in each stitch (12 sts)
- Rnd 3: Sc 1, Inc (18 sts)
- Rnd 4: Sc 1, Inc, Sc 2, Inc 5x, Sc 1 (24 sts)
- Rnd 5: Sc 3, Inc (30 sts)
- Rnd 6: Sc 2, Inc, Sc 4, Inc 5x, Sc 2 (36 sts)
- Rnd 7: Sc 5, Inc (42 sts)
- Break yarn and leave enough yarn to sew the legs in place.
- Fold the legs into a half-circle and join with slip stitches (21 sts).
Tail (Pink):
- Rnd 1: Sc 3 in a magic ring (3 sts)
- Rnd 2: Sc 2 in each stitch (6 sts)
- Rnd 3: Sc 1, Inc (9 sts)
- Rnd 4-7: Sc 1 in each stitch (9 sts)
- Finish with 1 sl st in the first stitch. Break yarn and leave enough yarn to sew the tail in place.
Shield (Gray):
- Rnd 1: Sc 6 in a magic ring (6 sts)
- Rnd 2: Sc 2 in each stitch (12 sts)
- Rnd 3: Sc 2 in each stitch (24 sts)
- Rnd 4: Sc 1, Inc (36 sts)
- Rnd 5-6: Sc 1 in each stitch (36 sts)
- Rnd 7: Sc 2, Inc (48 sts)
- Rnd 8-10: Sc 1 in each stitch (48 sts)
- Rnd 11: Sc 3, Inc (60 sts)
- Rnd 12-13: Sc 1 in each stitch (60 sts)
- Rnd 14: Sc 4, Inc (72 sts)
- Rnd 15-16: Sc 1 in each stitch (72 sts)
- Rnd 17: Sc 5, Inc (84 sts)
- Rnd 18: Sc 1 in each stitch (84 sts)
- Rnd 19: Sc 77 in front loop only (77 sts) – leave 7 stitches unworked for head attachment.
Stomach (White):
- Attach yarn to round 18 of the shield.
- Rnd 1: Sc 4, chain 7, skip 7 sts, Sc 17, chain 5, skip 5 sts, Sc 4, chain 3, skip 3 sts, Sc 4, chain 5, skip 5 sts, Sc 17, chain 7, skip 7 sts, Sc 11 (84 sts)
- Rnd 2: Sc 1 in each stitch (84 sts)
- Rnd 3-4: Sc 1 in each stitch (84 sts)
- Continue decreasing and attaching legs and tail as indicated in the pattern.
Assembly:
- Sew the head to the 7 unworked stitches from round 19 of the shield.
- Attach the front legs, back legs, and tail in their respective chain spaces in the shield.
- Weave in all ends to complete your adorable Sweet Turtle!