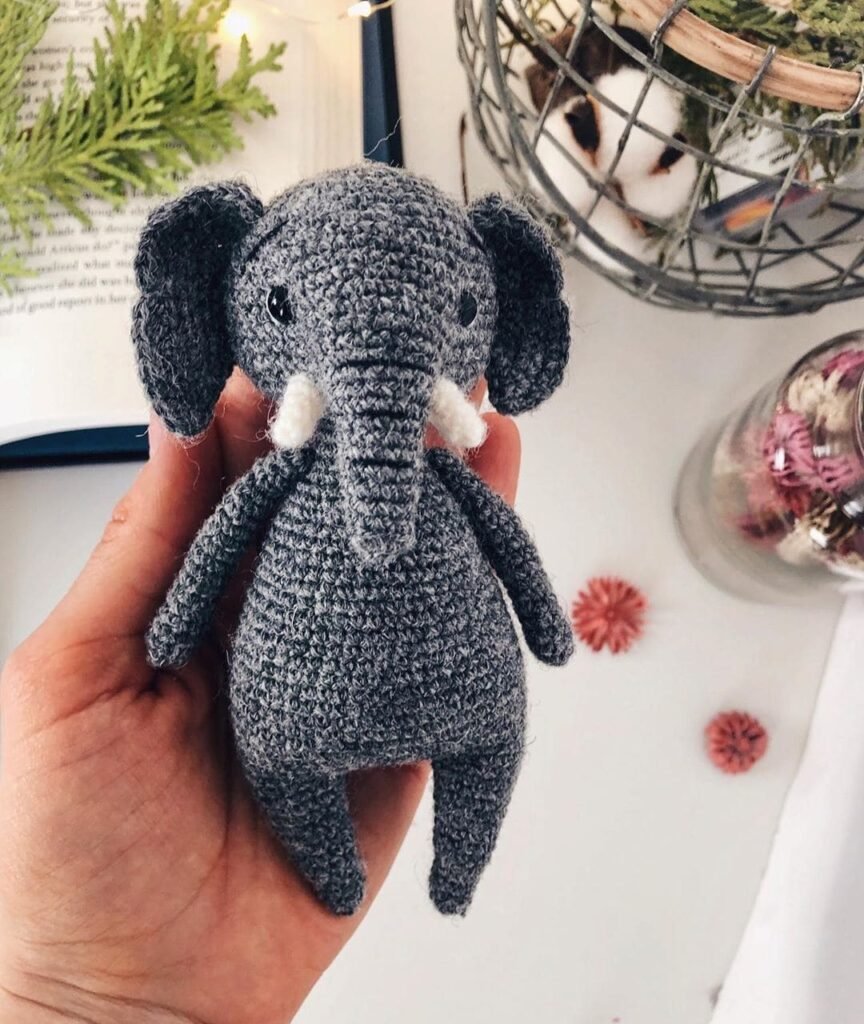
It looks like you are sharing a wonderful free amigurumi pattern for a cute little creature! Below is a summarized and organized version of your pattern with the steps clearly outlined for easy following. This pattern includes instructions for a head, trunk, tusks, ears, hands, legs, and body.
Materials & Tools
- Woolen yarn Wolle Rödell (50 g / 120 m)
- Hook 1.5 mm
- Thread for embroidery muzzle
- Toy eyes (6 mm)
- Toy filler
- Needle for sewing details
- Scissors
Abbreviations:
- KA – magic ring
- vp – chain stitch
- sc – single crochet
- pr – increase
- dec – decrease
- ss – slip stitch
Head (Make 1)
- Round 1: 6 sc in KA (6)
- Round 2: 6 inc (12)
- Round 3: (1 sc, inc) x 6 (18)
- Round 4: (2 sc, inc) x 6 (24)
- Round 5: (3 sc, inc) x 6 (30)
- Round 6: (4 sc, inc) x 6 (36)
- Round 7: 36 sc (36)
- Round 8: (5 sc, inc) x 6 (42)
- Round 9: (6 sc, inc) x 6 (48)
- Round 10: (7 sc, inc) x 6 (54)
- Rounds 11–17: 54 sc (7 rows)
- Round 18: 2 sc, dial 6 ch, skip 12 sc, 40 sc to end (48)
- Round 19: 2 sc, 6 sc in ch, 40 sc (48)
- Round 20: (6 sc, dec) x 6 (42)
- Round 21: (5 sc, dec) x 6 (36)
- Round 22: (4 sc, dec) x 6 (30)
- Round 23: (3 sc, dec) x 6 (24)
- Round 24: (2 sc, dec) x 6 (18)
- Round 25: ss and trim thread. Stuff the head. Insert eyes between rows 14 and 15.
Trunk (Make 1)
- Attach thread to missed 12 sc from Row 18 of the head:
- Round 1: 12 sc, 6 sc in ch (18)
- Round 2: 18 sc (18)
- Round 3: 9 sc, dec, 7 sc (17)
- Round 4: dec, 15 sc (16)
- Round 5: 7 sc, dec, 7 sc (15)
- Round 6: 6 dec, 13 sc (14)
- Round 7: 14 sc (14)
- Round 8: 6 sc, dec, 6 sc (13)
- Round 9: 13 sc (13)
- Round 10: dec, 11 sc (12)
- Round 11: 6 sc, dec, 4 sc (11)
- Round 12: 11 sc (11)
- SS and trim the thread. Pull the hole closed and hide the tip.
Tusks (Make 2)
- Round 1: 4 sc in KA (4)
- Round 2: 1 sc, inc, 3 sc (5)
- Round 3: 5 sc (5)
- Round 4: 1 sc, inc, 4 sc (6)
- Round 5: 6 sc (6)
- SS and trim thread. Leave the end for sewing.
Ears (Make 2)
- Ch 15, starting from the second chain from the hook, crochet:
- Row 1: 14 sc, ch, turn
- Row 2: dec, 11 sc, inc, ch, turn
- Row 3: inc, 11 sc, dec, ch, turn
- Row 4: dec, 11 sc, inc, ch, turn
- Row 5: inc, 11 sc, dec, ch, turn
- Row 6: dec, 11 sc, inc, ch, turn
- Tie off and crochet around the entire ear. Trim thread, leaving a long end for sewing. Optionally, pinch the outer edge of the ear for added effect.
Hands (Make 2)
- Round 1: 6 sc in KA (6)
- Round 2: (1 sc, inc) x 3 (9)
- Rounds 3–19: 9 sc (17 rows)
- Fold in half and crochet 4 sc through both layers.
Legs (Make 2)
- Round 1: 6 sc in KA (6)
- Round 2: (1 sc, inc) x 3 (9)
- Rounds 3–5: 9 sc (3 rows)
- Round 6: (2 sc, inc) x 3 (12)
- Rounds 7–9: 12 sc (3 rows)
- Round 10: (3 sc, inc) x 3 (15)
- Rounds 11–12: 15 sc (2 rows)
- Round 13: (4 sc, inc) x 3 (18)
- Rounds 14–18: 18 sc (5 rows)
- Fasten off the first leg. For the second leg, continue crocheting the body.
Body (Make 1)
- From the second leg, chain 6, and join the first leg. Crochet:
- 18 sc on the first leg, 6 sc in ch, 18 sc on the second leg, 6 sc on the second side of the ch (48)
- Round 2: 15 sc, (1 sc, inc) x 3, (inc, 1 sc) x 3, 21 sc (54)
- Rounds 3–12: 54 sc (10 rows)
- Round 13: (7 sc, dec) x 6 (48)
- Rounds 14–16: 48 sc (3 rows)
- Round 17: (6 sc, dec) x 6 (42)
- Rounds 18–19: 42 sc (2 rows)
- Round 20: (5 sc, dec) x 6 (36)
- Rounds 21–22: 36 sc (2 rows)
- Round 23: (4 sc, dec) x 6 (30)
- Rounds 24–25: 30 sc (2 rows)
- Round 26: (3 sc, dec) x 6 (24)
- Rounds 27–28: 24 sc (2 rows)
- Round 29: (2 sc, dec) x 6 (18)
- Round 30: 18 sc
- SS and trim the thread, leaving a long end for sewing.
Final Steps:
- Attach all body parts (head, tusks, trunk, ears, hands, and legs) by sewing them in place.
- Add any additional details like embroidery or pinches to enhance the character.
- Once finished, take a photo and tag @freeamigurumii on Instagram or Facebook!
Enjoy your amigurumi creation!