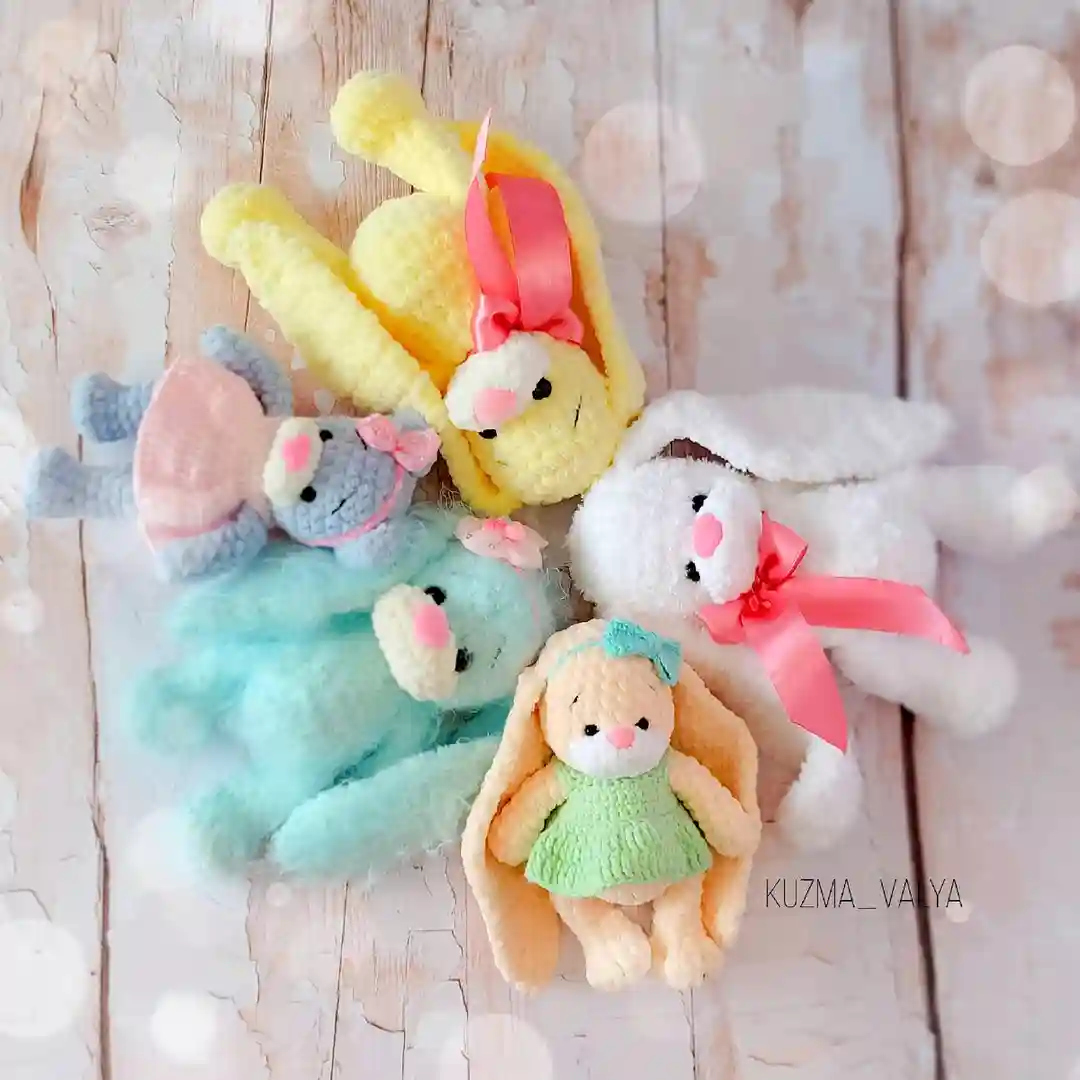

Free Crochet Bunny “Buсya” Masterclass by Valentina Kuzminа (@kuzma_valua)
In this tutorial, you will learn how to crochet a plush bunny with long ears. For amigurumi, any plush or fluffy yarn and an appropriate crochet hook will work well.
The finished toy will measure approximately:
- 20-22 cm when using Himalaya Dolphin Baby
- 19-21 cm when using Alize Velutto or Rozetti Lollipop
Materials and Tools
To crochet the bunny, you’ll need the following materials:
- Yarn for the body:
- Alize Velutto (1 skein)
- Rozetti Lollipop (a little less than 1 skein)
- Himalaya Koala (2/3 of a skein)
- Himalaya Dolphin Baby (half a skein)
- YarnArt Dolce (slightly more than half a skein)
- Yarn for the face: Himalaya Dolphin Baby or YarnArt Dolce
- Crochet Hook: 2.5-4.5 mm
- Safety Eyes: 4-8 mm
- Triangle Nose
- Thread for sewing
- Stuffing for the toy
- Ribbon for decoration (30 cm)
- Needle for attaching details
- Scissors
Abbreviations
- KA – Magic ring (amigurumi)
- vp – Chain stitch
- ss – Slip stitch
- sc – Single crochet (US)
- inc – Increase
- dec – Decrease
- (…) x n – Repeat n times
Step-by-Step Instructions for Crocheting the “Buсya” Bunny
1. Lower Paws (2 Pieces)
We crochet in rounds, from bottom to top.
- 8 sc in KA
- 8 inc (16)
- 16 sc
- (2 sc, dec) x 2, (5 dec) – This forms the center of the paw (10)
5-11. 10 sc (7 rows). Optionally, you can stuff the foot slightly. - Fold the piece in half and crochet 5 sc through both sides of the fold. Close the round and tie off.
2. Upper Paws (2 Pieces)
We crochet in rounds, from bottom to top.
- 8 sc in KA
2-8. 8 sc (7 rows) - Fold the piece in half and crochet 1 sc, dec, 1 sc. Close the round and tie off.
3. Ears (2 Pieces)
We crochet back-and-forth in rows, with a turning chain at the beginning of each row.
- Make a chain of 5 vp. Starting from the second chain from the hook, crochet 4 sc, turn the work.
2-3. 4 sc (2 rows) - (1 sc, inc, 1 sc)
5-6. 6 sc (2 rows) - (1 sc, inc, 2 sc, inc, 1 sc)
8-9. 8 sc (2 rows) - (1 sc, inc, 4 sc, inc, 1 sc)
11-14. 10 sc (4 rows) - (1 sc, dec, 4 sc, dec, 1 sc)
16-17. 8 sc (2 rows) - (1 sc, dec, 2 sc, dec, 1 sc)
19-20. 6 sc (2 rows) - dec, 2 sc, dec
- 2 dec
- dec
Tie off the yarn and hide the ends.
4. Body & Head
We crochet in rounds, from bottom to top.
- 6 sc in KA
- 6 inc (12)
- (1 sc, inc) x 6 (18)
- (2 sc, inc) x 6 (24)
In this round, attach the legs. - (3 sc, 5 sc with leg) x 2, 8 sc, (5 sc with leg) x 2, 3 sc (24)
6-7. 24 sc (2 rows)
Crochet the belly: 1 sc between decreases for the center of the belly. - (6 sc, 3 dec, 1 sc, center of the belly), 3 dec, 5 sc (18)
Stuff tightly as you go.
9-10. 18 sc (2 rows) - (1 sc, dec) x 6 (12)
In this round, attach the arms. - (3 sc, 3 sc with arm) x 2 (12)
Proceed to crochet the head. - 12 inc (24)
14-19. 24 sc (6 rows)
In this round, attach the ears. - 8 sc, 4 sc with ear, 9 sc, 3 sc with ear (1 sc ear moves to round 21!) (24)
- (1 sc with ear, 1 sc, dec, (2 sc, dec) x 5) (18)
- (1 sc, dec) x 6 (12)
- 6 dec
Tie off the yarn and hide the ends inside the piece.
5. Tail
- 8 sc in KA
- 8 sc
- (2 sc, dec, 2 sc, dec)
Tie off the yarn and leave a tail for attaching to the body.
6. Face
We crochet in rounds. To maintain proportions, use the same yarn as indicated in the materials list for the face.
- Make a chain of 7 vp. Starting from the second chain from the hook, crochet (1 inc, 4 sc, 3 inc, 4 sc, inc)
- (inc, 4 sc, 3 inc, 4 sc, inc)
- 20 sc
- Crochet 13 more sc, ss.
The additional row is the bottom part of the face; the unworked part is the top. Tie off the yarn.
Assembling the Toy
- Sew on the face
- Attach the eyes
- Embroider the eyebrows
- Sew on the tail
- Hide all yarn ends