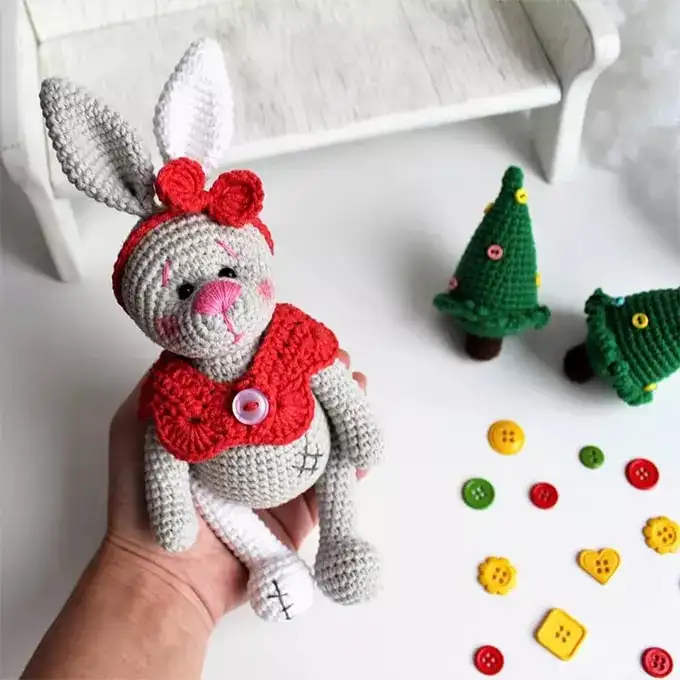
Free Crochet Workshop: How to Make a Bunny “Roberto” by Julia Maksimova (@twinsprsins)
In this tutorial, you will learn how to crochet a simple bunny using the Jeans yarn. For amigurumi, any cotton-based yarn will work well, such as YarnArt Jeans, Alize Cotton Gold, Vita Lira, and others. The toy is easy to make, with the body and legs crocheted as a single piece, while the arms, ears, and head are sewn on later. Everything is crocheted in a spiral. The face is finished with embroidery.
Materials and Tools
- Yarn: YarnArt Jeans (for the body, cheeks, and highlights)
- Crochet hook: 2 mm
- Safety eyes: 8 mm
- Stuffing for the toy
- Needle for sewing parts together
- Scissors
Abbreviations
- KA – Magic ring
- ch – Chain stitch
- sc – Single crochet
- inc – Increase (2 sc in one stitch)
- dec – Decrease (crochet 2 stitches together)
- (…) x n – Repeat the pattern inside parentheses n times
Crochet Bunny “Roberto” Instructions
Head
- Round 1: 6 sc in KA (6)
- Round 2: inc x 6 (12)
- Round 3: (1 sc, inc) x 6 (18)
- Round 4: 1 sc, inc, (2 sc, inc) x 5, 1 sc (24)
- Round 5: (3 sc, inc) x 6 (30)
- Round 6: 2 sc, inc, (4 sc, inc) x 5, 2 sc (36)
- Round 7: (5 sc, inc) x 6 (42)
- Rounds 8-14: 42 sc (7 rounds)
- Round 15: 3 sc, inc, (6 sc, inc) x 5, 3 sc (48)
- Rounds 16-18: 48 sc (3 rounds)
- Round 19: 9 sc, (dec, 3 sc) x 3, 9 sc, (dec, 3 sc) x 3 (36)
- Round 20: 9 sc, (dec, 2 sc) x 3, 9 sc, (dec, 2 sc) x 3 (30)
- Round 21: 9 sc, (dec, 1 sc) x 3, 9 sc, (dec, 1 sc) x 3 (24)
- Round 22: 9 sc, dec x 3, 9 sc, dec x 3 (18)
- Round 23: (2 sc, dec) x 6 (12)
Position the eyes 8 sc apart between rounds 13 and 14. Add cheeks, highlights, and tighten the face with embroidery.
Ears (Make 2)
- Round 1: 6 sc in KA (6)
- Round 2: inc x 6 (12)
- Round 3: (1 sc, inc) x 6 (18)
- Round 4: 1 sc, inc, (2 sc, inc) x 5, 1 sc (24)
- Rounds 5-7: 24 sc (3 rounds)
- Round 8: (6 sc, dec) x 3 (21)
- Rounds 9-10: 21 sc (2 rounds)
- Round 11: (5 sc, dec) x 3 (18)
- Rounds 12-13: 18 sc (2 rounds)
- Round 14: (4 sc, dec) x 3 (15)
- Rounds 15-17: 15 sc (3 rounds)
Sew the ears to the head.
Arms (Make 2)
- Round 1: 6 sc in KA (6)
- Round 2: (2 sc, inc) x 2 (8)
- Rounds 3-16: 8 sc (14 rounds)
Fold in half and crochet 4 sc. Cut the thread.
Body
Continue working with the second leg:
- Round 1: Ch 9, 12 sc along the leg, 9 sc along the ch, 12 sc along the leg, 9 sc (42)
- Round 2: (6 sc, inc) x 6 (48)
- Rounds 3-12: 48 sc (10 rounds)
- Round 13: (2 sc, dec) x 3, 13 sc, (dec, 2 sc) x 3, 10 sc (42)
- Rounds 14-17: 42 sc (4 rounds)
- Round 18: (5 sc, dec) x 6 (36)
- Round 19: (4 sc, dec) x 6 (30)
- Round 20: (3 sc, dec) x 6 (24)
Insert the arms as follows:
- Round 21: 2 sc, 4 sc along the arm, 9 sc, 4 sc along the arm, 5 sc (24)
- Round 22: (1 sc, dec) x 3, 3 sc, (dec, 1 sc) x 3 (18)
- Round 23: 18 sc (final round)
Assembling the Bunny
- Sew the head to the body.
- Position the arms and ears and sew them securely.
- Optionally, embroider the face with a smile and other details.
Now you have a cute, crocheted bunny “Roberto” ready for cuddling!