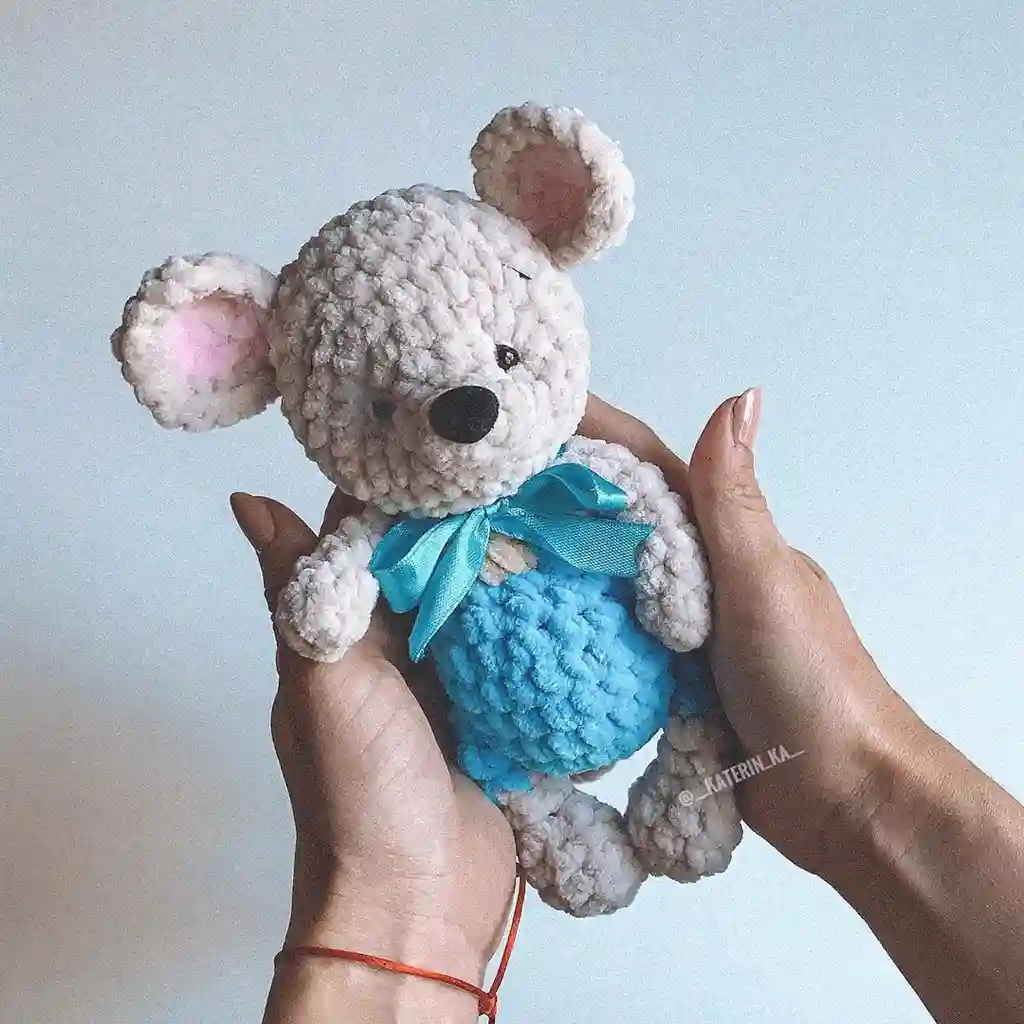
Free Crochet Masterclass: “Micey Misha” by Ekaterina Kryzhanovskaya (@katerina_k)
In this masterclass, you can learn how to crochet a plush mouse named “Misha” using the given instructions. For this amigurumi project, you will need any plush yarn and an appropriate crochet hook. You can create a single-colored toy or add striped details, just like in the photo. The legs are crocheted directly into the body (alternatively, they can be sewn on). For decoration, use satin ribbon, plastic eyes, and a velvet nose. The ears require a small amount of pink yarn. You will need about half a skein of gray yarn for one mouse.
Finished Toy Size: Approximately 20 cm (8 inches).
Materials and Tools
- Plush yarn (e.g., Himalaya Dolphin Baby) – 1/2 skein of the main color, a small amount of pink for the ears
- Muline (for embroidery of eyebrows)
- Crochet hook (4.5 mm)
- Safety eyes
- Toy nose
- Toy filling
- Stitch markers
- Pins
- Satin ribbon for the bow
- Needle for attaching details
- Scissors
Abbreviations:
- KA – Magic ring (Crochet in the round)
- ch – Chain stitch
- sl st – Slip stitch
- sc – Single crochet
- inc – Increase
- dec – Decrease
- (…) x n – Repeat n times
Crochet Instructions: Micey Misha
Arms
- Round 1: 6 sc in a magic ring (KA).
- Round 2: (1 sc + inc) x 3 (9 stitches).
- Rounds 3-4: 9 sc.
- Round 5: (1 sc + dec) x 3 (6 stitches).
- Rounds 6-9: 6 sc.
Fold the arm in half and crochet 3 sc through both layers. Cut the yarn.
(Note: I do not stuff the arms, but you can stuff the palms lightly if you wish.)
Legs
- Round 1: 6 sc in a magic ring (KA).
- Round 2: inc x 6 (12 stitches).
- Rounds 3-4: 12 sc.
- Round 5: (1 sc, 2 dec, 1 sc, dec, 1 sc) x 1 (8 stitches).
- Rounds 6-10: 8 sc.
Fold the leg in half and crochet 4 sc through both layers. Cut the yarn.
Body
If you prefer, you can sew the legs on later instead of crocheting them into the body.
- Round 1: 6 sc in a magic ring (KA).
- Round 2: inc x 6 (12 stitches).
- Round 3: (1 sc + inc) x 6 (18 stitches).
- Round 4: (2 sc + inc) x 6 (24 stitches).
- Round 5: Crochet legs by inserting 4 sc through the leg and body, 7 sc, 4 sc through the leg and body, 9 sc (24 stitches).
- Rounds 6-7: 24 sc.
- Round 8: (2 sc, dec) x 6 or (2 sc + dec) x 6 (18 stitches).
- Round 9: 18 sc.
- Round 10: (4 sc, dec) x 3 (15 stitches).
- Round 11: Crochet arms by inserting 1 sc and 3 sc through the arm and body, 3 sc, 3 sc through the arm and body, 5 sc (15 stitches).
(Ensure that the arms are positioned parallel to the legs! Adjust slightly if necessary.)
- Round 12: 15 sc.
Finish off the yarn, leaving a long end for attaching the head. Stuff the body.
Head
- Round 1: 6 sc in a magic ring (KA).
- Round 2: (1 sc + inc) x 3 (9 stitches).
- Round 3: 9 sc.
- Round 4: (2 sc + inc) x 3 (12 stitches).
- Round 5: (1 sc + inc) x 6 (18 stitches).
- Round 6: (2 sc + inc) x 6 (24 stitches).
- Round 7: (3 sc + inc) x 6 (30 stitches).
- Round 8: (4 sc + inc) x 6 (36 stitches).
- Rounds 9-11: 36 sc.
(Place safety eyes and the nose as you go.)
- Round 12: (4 sc, dec) x 6 (30 stitches).
- Round 13: (3 sc, dec) x 6 (24 stitches).
- Round 14: (2 sc, dec) x 6 (18 stitches).
- Round 15: (1 sc, dec) x 6 (12 stitches).
- Round 16: 6 dec (6 stitches).
Cut the yarn, pull tight to close the hole, and hide the end inside the neck area. (I also use this yarn to create some shaping for the eyes.)
Ears
Crochet 4 pieces in total:
First two parts:
- Round 1: 6 sc in a magic ring (KA).
- Round 2: 6 inc (12 stitches).
Last two parts:
- Round 1: 6 sc in a magic ring (KA).
- Round 2: 6 inc (12 stitches).
- Round 3: (1 sc + inc) x 5.
Attach the small part to the larger one. Optionally, you can crochet 1-2 rows in pink yarn before changing to gray and crocheting the last row.
Tail
Attach the yarn at the point where the tail will be. Crochet a chain stitch to the desired tail length (I used 16 ch). Turn the work around and crochet back, fastening off the yarn and tying a knot.
Final Steps
Sew the head onto the body, attach the nose, eyes, eyebrows, and add any clothing or accessories you wish.
Your crocheted mouse is now complete! Please remember to tag the author on social media: @katerina_k.