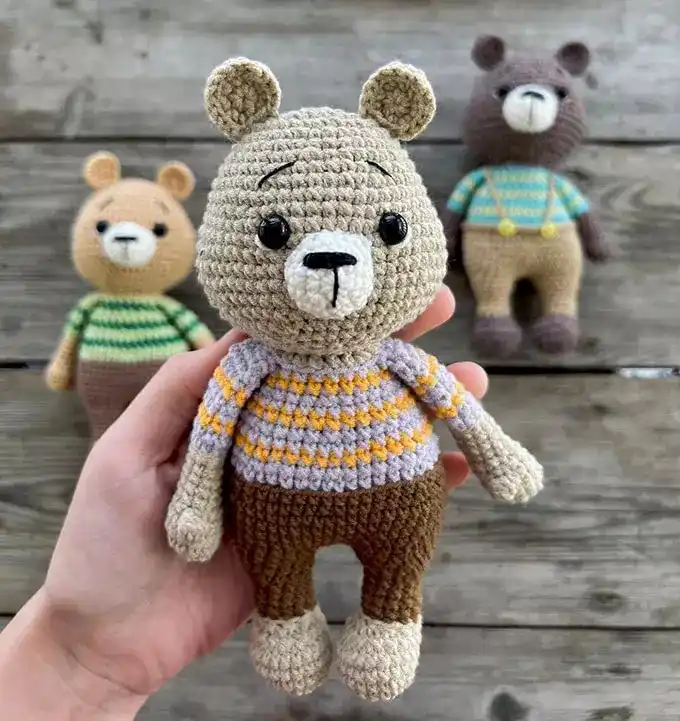
Free Amigurumi Pattern: Cute Character Tutorial
Hello, amigurumi lovers and beautiful visitors! In this article, I will be sharing a free amigurumi pattern with step-by-step instructions for creating a cute character. By the end of this article, you’ll also find a list of other amigurumi patterns that might inspire your next project.
Materials Needed
- Yarn: Himalayas Dolphin Baby or YarnArt Dolce
- Hook Size: 4.0 mm or 3.5 mm
- Plastic Doll Seals: 4 (15 mm) for attaching arms and legs to the body
- Safety Eyes: 14 mm
- Safety Nose: 10 mm
- Thin Thread: In matching color for sewing details together
- Black Embroidery Thread
- Sewing Needle and Scissors
- Fiberfill (Stuffing)
Abbreviations
- ( ms ) / ( sc): Single Crochet (SC)
- ( BO ): Slip Stitch
- ( ml ) / ( ch): Chain Stitch (CH)
- ( MR ): Magic Ring
- ( dim ) / ( dec): Decrease
- ( augm ) / ( inc): Increase
- ( M ) / ( st): Stitch
- ( FLO ): Front Loop Only
- ( BLO ): Back Loop Only
- ( d-br ) / ( dble.b): Double Crochet (DC)
- ( br ) / ( dc): Flange
- ( dB ) / ( hdc): Half Double Crochet
- ( mc ) / ( sl-st): Slip Stitch
- ( db / dbr) / ( dtr): Double Treble Crochet
- ( mct ) / ( tch): Chain for turning
- ( 3msm ) / ( sc3tog): 3 Single Crochets Together
- ( F.o. ): Finish Off
Head
Start with brown yarn:
- R1: 6 ms in MR (6)
- R2: (augm) * 6 (12)
- R3: 1 ms, 3 augm, 3 ms, 3 augm, 2 ms (18)
- R4: 2 ms, 1 augm, 1 ms, 1 augm, 3 ms, 3 ms in 1 st, 3 ms, 1 augm, 1 ms, 1 augm, 3 ms (24)
- R5: 11 ms, 2 augm, 11 ms (26)
- R6: 7 ms, (1 ms, augm) * 6, 7 ms (32)
- R7: 7 ms, (2 ms, augm) * 5, 10 ms (37)
Insert safety eyes between R5 and R6, spaced 5-6 stitches apart, and insert safety nose between R2 and R3.
Switch to orange yarn:
- R8: 5 ms, 1 augm, 6 ms, 1 augm, 5 ms, 1 augm, 5 ms, 1 augm, 6 ms, 1 augm, 5 ms (42)
- R9-15: 42 ms (7 rows)
- R16: (5 ms, dim) * 6 (36)
- R17: (4 ms, dim) * 6 (30)
- R18: (3 ms, dim) * 6 (24) – fill with fiberfill.
- R19: (2 ms, dim) * 6 (18)
- R20: (1 ms, dim) * 6 (12) – Finish filling.
- R21: (dim) * 6 (6)
- F.o.
Ears (Make 2)
With brown yarn:
- R1: 6 ms in MR (6)
- R2: (augm) * 6 (12)
- R3: 12 ms
Switch to orange yarn:
- R4: (3 ms, augm) * 3 (15)
- R5-6: 15 ms (2 rows)
Do not fill with fiberfill. Fold the top of the ear flat and sew it to the head.
Arms (Make 2)
- Fill as you go.
With brown yarn:
- R1: 7 ms in MR (7)
- R2: (augm) * 7 (14)
- R3-5: 14 ms (3 rows)
- R6: (1 ms, dim, 2 ms, dim) * 2 (10)
- R7-9: 10 ms (3 rows)
Switch to orange yarn:
- R10-16: 10 ms (7 rows)
- Finish filling.
- R17: (dim) * 5 (5)
- F.o.
Legs (Make 2)
- Fill as you go.
With brown yarn:
- R1: 6 ms in MR (6)
- R2: (augm) * 6 (12)
- R3: (1 ms, augm) * 6 (18)
- R4: (8 ms, augm) * 2 (20)
- R5-6: 20 ms (2 rows)
- R7: 6 ms, 4 dim, 6 ms (16)
- R8: 4 ms, 4 dim, 4 ms (12)
- R9-10: 12 ms (2 rows)
Switch to orange yarn:
- R11-17: 12 ms (7 rows)
- Finish filling.
- R18: (dim) * 6 (6)
- F.o.
Attaching Arms and Legs
- Attach the arms to the body between R18 and R19 at the neck using buttons or plastic doll joints (insert a plastic joint between R15 and R16 of the arm).
- Attach the legs to the body between R6 and R7 of the body using buttons or plastic doll seals (insert a plastic seal between R16 and R17 of the leg).
- If you prefer not to use buttons or seals, sew the legs on R8 of the body and the arms on R19.
Body
With orange yarn:
- R1: 6 ms in MR (6)
- R2: (augm) * 6 (12)
- R3: (1 ms, augm) * 6 (18)
- R4: (2 ms, augm) * 6 (24)
- R5: (3 ms, augm) * 6 (30)
- R6: (4 ms, augm) * 6 (36)
- R7-11: 36 ms (5 rows)
- R12: (4 ms, dim) * 6 (30)
- R13-14: 30 ms (2 rows)
- R15: (3 ms, dim) * 6 (24)
- R16-19: 24 ms (4 rows)
- R20: (2 ms, dim) * 6 (18)
- R21: (3 ms, dim) * 6 (12)
- F.o.
Tail
With brown yarn:
- R1: 6 ms in MR (6)
- R2: (1 ms, augm) * 3 (9)
- R3-5: 9 ms (3 rows)
- R6: 1 dim, 7 ms (8)
Switch to orange yarn:
- R7-10: 8 ms (4 rows)
- R11: 1 dim, 6 ms (7)
- R12-16: 7 ms (5 rows)
Do not fill with fiberfill. F.o.
Assembly
- Sew the ears between R12 and R14 at a distance of 5-6 stitches apart.
- Sew the tail between R7 and R8.
- Embroider the whiskers and legs with black thread.
- Attach the head to the body.
Final Touches
Congratulations, your amigurumi character is complete! Feel free to tag me (@freeamigurumii) in your photos on Instagram or Facebook if you’d like to share your creation with the community!