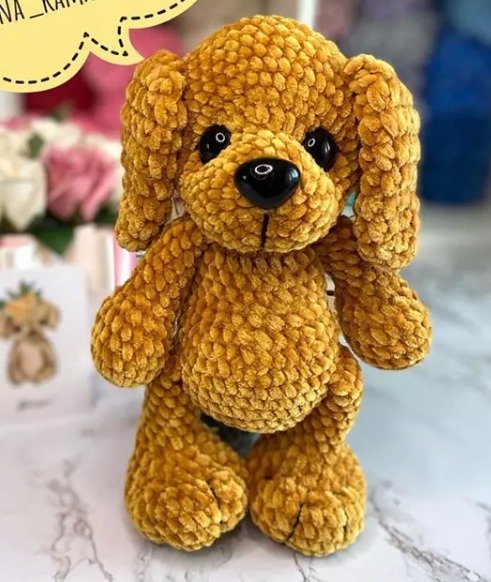
Amigurumi Puppy Free Pattern
Hello amigurumi lovers and beautiful visitors! I wanted to share a free amigurumi pattern for you. In this article, I will provide step-by-step instructions on how to make a cute puppy. At the end of the article, I will also share some additional amigurumi patterns that can spark your creativity.
Materials and Tools
- Plush yarn Himalaya Velvet 90030 (1.3 skeins)
- Thread for embroidery (muzzle and fingers)
- Crochet hooks: 3.5 mm (main) and 5 mm (for ears)
- Toy eyes (18 mm)
- Toy spout (25 mm)
- Toy filler
- Markers
- Needle for sewing details
- Scissors
Conventions
- KA – amigurumi ring
- vp – air loop
- sc – single crochet
- pssn – half-column with a crochet
- pr – increase
- ub – beauty
- (…) xn – repeat n times
Lower Paws (2 Parts)
Row 1:
7 ch, from 2 loops from the hook, 5 sc, 3 sc in 1 loop, turn, 4 sc, inc (14)
Row 2:
inc, 4 sc, 3 inc, 4 sc, 2 inc (20)
Row 3:
sc, inc, 4 sc, (sc, inc) x 3, 4 sc, (sc, inc) x 2 (26)
Row 4:
7 sc, (2 sc, inc) x 3, 10 sc (29)
Rows 5-7:
29 sc
Row 8:
6 sc, dec, 2 sc, dec, 4 sc, dec, 2 sc, dec, 7 sc (25)
Row 9:
6 sc, dec, 1 sc, dec, 2 sc, dec, 1 sc, dec, 7 sc (21)
Row 10:
5 sc, 5 dec, 6 sc (16)
Row 11:
4 sc, 4 dec, 4 sc (12)
Rows 12-19:
12 sc (8 rows)
Note:
We knit 3 more sc to the middle of the leg. Cut the thread and hide inside the part. Alternatively, fold the part in half and knit 7 sc, then knit one row less (18 rows instead of 19).
Upper Paws (2 Parts)
Row 1:
4 ch, from 2 loops from the hook 2 sc, 3 sc in 1 loop, turn, 1 sc, inc (8)
Row 2:
inc, 1 sc, 3 inc, 1 sc, 2 inc (14)
Row 3:
3 sc, (sc, inc) x 3, 5 sc (17)
Rows 4-6:
17 sc
Row 7:
4 sc, (1 sc, dec) x 3, 4 sc (14)
Row 8:
4 sc, 3 dec, 2 sc, dec (10)
Rows 9-16:
10 sc (8 rows)
Note:
We knit 2 more sc to the middle of the leg. Cut the thread and hide inside the part.
Torso
Row 1:
2 ch, in 2 loop from the hook 6 sc (6)
Row 2:
(pr) x 6 (12)
Row 3:
(1 sc, inc) x 6 (18)
Row 4:
(2 sc, inc) x 6 (24)
Row 5:
(3 sc, inc) x 6 (30)
Row 6:
30 sc
Row 7:
(4 sc, inc) x 6 (36)
Row 8:
36 sc
Row 9:
We knit the lower paws in this row:
6 sc together with the foot, 12 sc, 6 sc together with the foot, 12 sc (36)
Rows 10-11:
36 sc
Row 12:
7 sc, dec, 3 sc, dec, 3 sc, dec, 17 sc (33)
Row 13:
7 sc, dec, 2 sc, dec, 2 sc, dec, 16 sc (30)
Row 14:
6 sc, dec, 1 sc, dec, 1 sc, dec, 16 sc (27)
Row 15:
5 sc, 3 dec, 16 sc (24)
Rows 16-18:
24 sc (3 rows)
Row 19:
(2 sc, dec) x 6 (18)
Row 20:
We knit the upper paws in this row:
5 sc together with the foot, 4 sc, 5 sc together with the foot, 4 sc (18)
Row 21:
18 sc
Note:
Leave a long thread for sewing the head to the body.
Puppy Ears (2 Parts)
Use hook size 5 mm for Himalaya Velvet yarn (or size 5.5-6 mm for Dolphin Baby or YarnArt Dolce yarn).
Row 1:
2 ch, in 2 loop from the hook 6 sc (6)
Row 2:
(1 pssn, inc) x 3 (9)
Row 3:
(2 pssn, inc) x 3 (12)
Row 4:
(3 pssn, inc) x 3 (15)
Row 5:
(4 pssn, inc) x 3 (18)
Row 6:
(2 pssn, inc) x 6 (24)
Rows 7-8:
24 pssn
Row 9:
(4 hcs, dec) x 4 (20)
Row 10:
(3 pssn, dec) x 4 (16)
Note:
Leave the thread for sewing.
Puppy Tail
Row 1:
2 ch, in 2 loop from the hook 6 sc (6)
Row 2:
6 sc
Row 3:
(2 sc, inc) x 2 (8)
Rows 4-9:
8 sc (6 rows)
Row 10:
(3 sc, inc) x 2 (10)
Rows 11-12:
10 sc
Row 13:
(4 sc, inc) x 2 (12)
Rows 14-15:
12 sc
Note:
Leave the thread for sewing. The tail doesn’t need to be stuffed much. Attach the tail between the paws, around the 10-11th row.
Puppy Head
Row 1:
2 ch, in 2 loop from the hook 6 sc (6)
Row 2:
(pr) x 6 (12)
Row 3:
(1 sc, inc) x 6 (18)
Row 4:
(2 sc, inc) x 6 (24)
Rows 5-7:
24 sc
Row 8:
8 sc, 8 inc, 8 sc (32)
Row 9:
6 sc, (2 sc, inc) x 6, 8 sc (38)
Row 10:
10 sc, inc, 4 sc, inc, 6 sc, inc, 4 sc, inc, 10 sc (42)
Rows 11-17:
42 sc (7 rows)
Row 18:
(5 sc, dec) x 6 (36)
Note:
Insert the eyes in the 8th row. Position them as follows:
- 1st eye between the 1st and 2nd increase.
- 2nd eye between the 7th and 8th increase.
The spout should go between the 2nd and 3rd rows.
Row 19:
36 sc
Row 20:
(4 sc, dec) x 6 (30)
Row 21:
(3 sc, dec) x 6 (24)
Row 22:
(2 sc, dec) x 6 (18)
Row 23:
(1 sc, dec) x 6 (12)
Row 24:
6 dec (tighten the hole and hide the thread)
All Finished!
Feel free to tag me (@freeamigurumii) in your photos on Instagram or Facebook if you’d like!