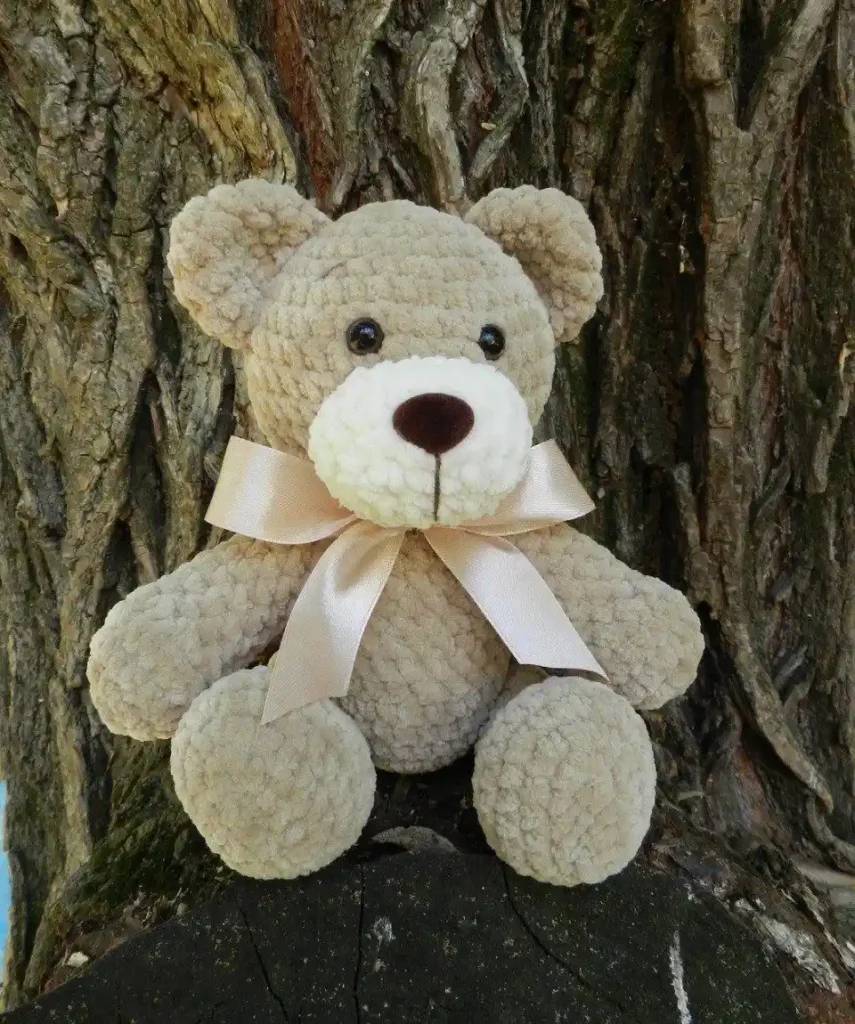
Teddy Bear Amigurumi by Yulia Chebanova
This adorable plush teddy bear is crocheted using Himalaya Dolphin Baby yarn. The bear’s arms and legs are movable thanks to button joints.
Group on VKontakte: Honey Bunny Toys by Yulia Chebanova
Materials
- Main Yarn: Himalaya Dolphin Baby or Yarn Art Dolce (1 skein)
- Secondary Yarn: A little white or cream yarn for accents
- Hook: 4.5 mm crochet hook
- Filler: Polyester or cotton filling
- Eyes: 10 mm safety eyes
- Nose: 15×12 mm safety nose
- Marker: Row marker
- Needle: For sewing the parts together
- Thin Yarn: For detailing and embroidery
- Ribbon: 50 cm satin ribbon
- Height of Finished Toy: 35 cm
Crochet Abbreviations
- KA: Magic ring
- ch: Chain stitch
- sc: Single crochet
- inc: Increase
- dec: Decrease
Amigurumi Teddy Bear Crochet Pattern
Head
- 6 sc in a magic ring (6)
- (inc) x 6 (12)
- (1 sc, inc) x 6 (18)
- (2 sc, inc) x 6 (24)
- (3 sc, inc) x 6 (30)
- (4 sc, inc) x 6 (36)
- (5 sc, inc) x 6 (42)
8-12. 42 sc (5 rows) - (5 sc, dec) x 6 (36)
- (4 sc, dec) x 6 (30)
- (3 sc, dec) x 6 (24)
- (2 sc, dec) x 6 (18)
- (4 sc, dec) x 6 (15)
- Finish the head, cut the yarn.
- Insert the eyes between rows 9 and 10, about 4-5 sc apart.
Muzzle (Snout)
Using white yarn, create a chain of 6 ch.
- Starting from the second chain, 4 sc, 3 sc in one stitch, turn and continue on the other side of the chain: 3 sc, inc (12)
- inc, 3 sc, 3 inc, 3 sc, 2 inc (18)
- 1 sc, inc, 3 sc, (1 sc, inc) x 3, 3 sc, (1 sc, inc) x 2 (24)
- 24 sc
- Finish and leave a tail for attaching.
- Insert the nose between rows 3 and 4 of the muzzle.
Body
- 6 sc in a magic ring (6)
- (inc) x 6 (12)
- (1 sc, inc) x 6 (18)
- (2 sc, inc) x 6 (24)
- (3 sc, inc) x 6 (30)
- (4 sc, inc) x 6 (36)
7-9. 36 sc (3 rows) - (4 sc, dec) x 6 (30)
11-12. 30 sc (2 rows) - (3 sc, dec) x 6 (24)
14-15. 24 sc (2 rows) - (2 sc, dec) x 6 (18)
- 18 sc
- (4 sc, dec) x 3 (15)
- Leave a long tail of yarn for attaching.
Tail
- 6 sc in a magic ring (6)
- (inc) x 6 (12)
- 12 sc
- (dec) x 6 (6)
- Leave a long tail of yarn for attaching.
Ears (Make 2)
- 6 sc in a magic ring (6)
- (inc) x 6 (12)
- (1 sc, inc) x 6 (18)
4-5. 18 sc (2 rows)
- Leave a long tail of yarn for attaching.
Arms (Make 2)
- 6 sc in a magic ring (6)
- (inc) x 6 (12)
- (1 sc, inc) x 6 (18)
- 18 sc
- 3 sc, 6 dec, 3 sc (12)
6-12. 12 sc (7 rows) - (dec) x 6 (6)
- Close the hole. Secure and cut the yarn.
Legs (Make 2)
- Create a chain of 6 ch.
- Starting from the second chain: 4 sc, 3 sc in one stitch, turn and continue on the other side: 3 sc, inc (12)
- inc, 3 sc, 3 inc, 3 sc, 2 inc (18)
- 1 sc, inc, 3 sc, (1 sc, inc) x 3, 3 sc, (1 sc, inc) x 2 (24)
- 24 sc (2 rows)
- 6 sc, 5 dec, 8 sc (19)
- 5 sc, 4 dec, 6 sc (15)
- 15 sc
- (3 sc, dec) x 3 (12)
10-16. 12 sc (7 rows) - (dec) x 6 (6)
- Close the hole. Secure and cut the yarn.
Tip: If you’re using thread-based joints, make sure to stuff the upper part of the arms and legs very lightly.
Assembly
- Attach the head to the body.
- Sew the ears and muzzle to the head (place the muzzle directly under the eyes).
- Use thread-based joints to attach the arms.
- Pin the legs and tail with pins to find the correct position so the bear sits properly.
- Attach the legs to the body using thread-based joints.
- For the thread-based joints, the author uses Iris yarn in an appropriate color.
- Sew wooden buttons where the yarn was inserted on the arms and legs.
- Tie a satin ribbon into a bow around the neck.