Hello Amigurumi Lovers and Beautiful Visitors!
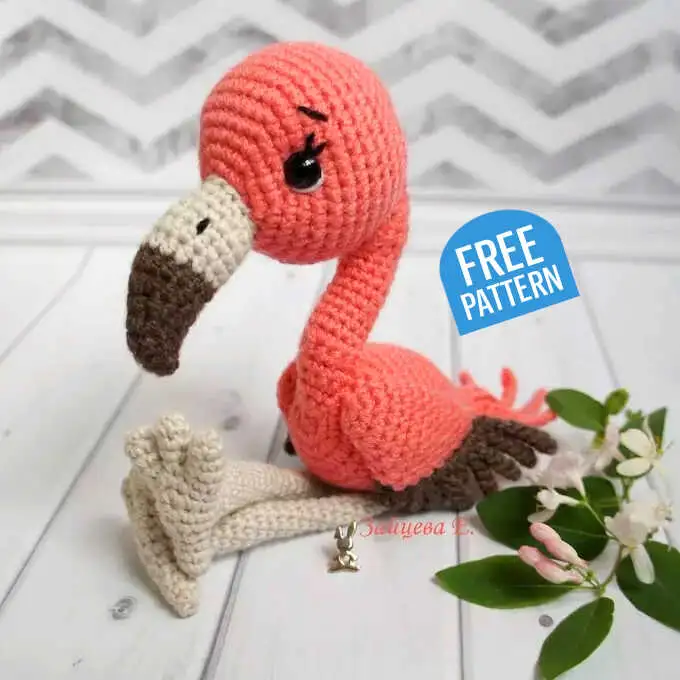
I’m thrilled to share a delightful free amigurumi pattern with you today. In this post, I’ll guide you through creating a charming toy step-by-step. Plus, at the end of the article, I’ll share additional amigurumi patterns to inspire your next project. Let’s get started!
Materials and Tools
- Yarn: Pink, brown, beige
- Hook
- Toy eyes
- Stuffing
- Wire (optional, for structure)
- Needle for sewing details
- Scissors
Abbreviations
- KA: Amigurumi ring
- vp: Air loop
- sc: Single crochet
- psbn: Single crochet
- ssn: Double crochet
- pssn: Half-column with a crochet
- pr: Increase
- ub: Decrease
- (…) x n: Repeat the sequence n times
Head
Pink color:
- 6 sc in KA
- 6 inc (12)
- (1 sc, inc) x 6 (18)
- (2 sc, inc) x 6 (24)
- (3 sc, inc) x 6 (30)
- (4 sc, inc) x 6 (36)
- (5 sc, inc) x 6 (42)
8-14. 42 sc - (5 sc, dec) x 6 (36)
- (4 sc, dec) x 6 (30)
- (3 sc, dec) x 6 (24)
- (2 sc, dec) x 6 (18)
- (1 sc, dec) x 6 (12)
- 6 dec (6)
Fasten, cut the thread, and hide the end inside.
Beak
Black color:
- 4 sc in KA
- (inc, 1 sc) x 2 (6)
- (inc, 2 sc) x 2 (8)
- inc, 1 sc, 4 dc, 1 sc, inc (10)
- inc, 1 sc, 6 prc, 1 pr, inc (12)
- 3 pr, 1 prc, 2 prc in one loop, 2 prc knit together, 2 prc in one loop, 1 prc, 3 sb (13)
- 3 sb, 3 dc, 2 dc in one loop, 3 dc, 3 sb (14)
- 1 sb, inc, inc, 2 sb, 8 dc, 1 dc (16)
Change to beige color: - 7 sbn, 8 dcs, 1 sbn (16)
- 8 sbn, 8 dcs (16)
- 16 sbn (16)
- 14 sbn, dec (15)
- dec, 11 sc, dec (13)
- dec, 8 sc, dec, 1 psb (11)
Fasten, cut the thread, leaving a long end for sewing. Attach the beak to the head. Sew or glue the eyes, and embroider eyebrows, eyelashes, and eye highlights.
Body
Pink color:
- 6 sc in KA
- 6 inc (12)
- (1 sc, inc) x 6 (18)
- (2 sc, inc) x 6 (24)
- (3 sc, inc) x 6 (30)
- (4 sc, inc) x 6 (36)
7-11. 36 sc - (10 sc, dec) x 3 (33)
- (9 sc, dec) x 3 (30)
- (8 sc, dec) x 3 (27)
- (7 sc, dec) x 3 (24)
- (6 sc, dec) x 3 (21)
- (5 sc, dec) x 3 (18)
- 18 sc
- (4 sc, dec) x 3 (15)
- 15 sc
- (3 sc, dec) x 3 (12)
- 6 dec (6)
Fasten, cut the thread, and hide the end inside.
Assembly
- Sew the head to the body.
- Attach the beak, eyes, and any embroidered details to the face.
- Sew the legs and feet to the body. Insert a wire frame if desired for added stability.
- Attach the wings to the sides of the body in your preferred position.
Feel free to share your finished creations with me! Tag me on Instagram or Facebook at @freeamigurumii—I’d love to see your work.
Happy crocheting! 💖