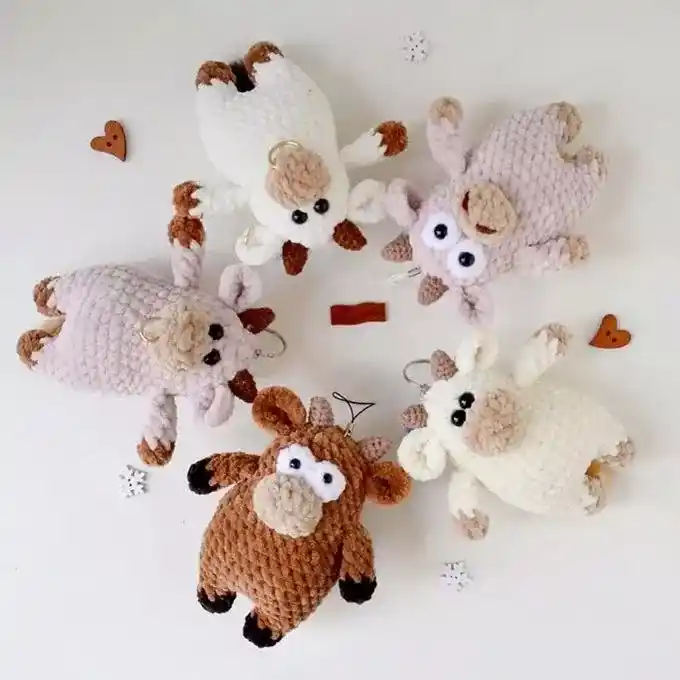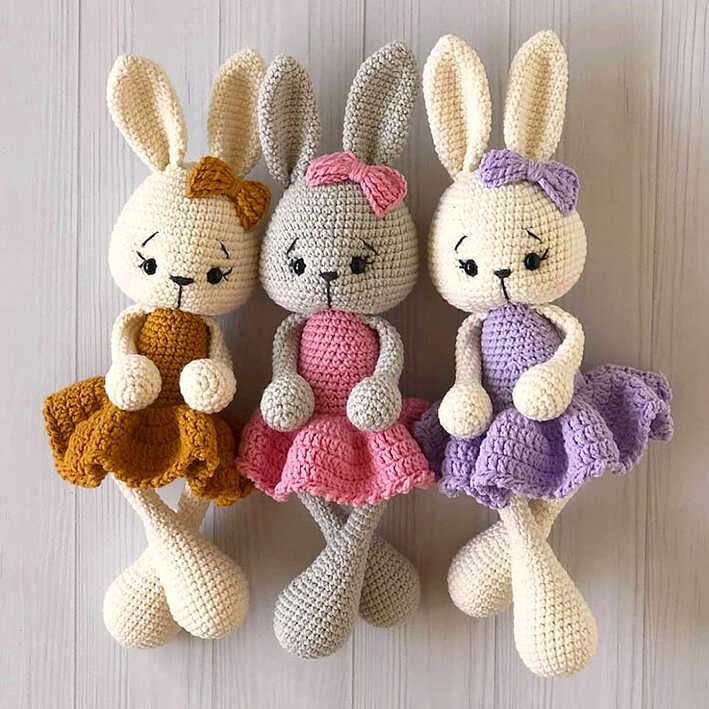
Hello dear Amigurumi Followers!
Today we are excited to share the Amigurumi Cute Bunny in Dress Free Pattern with you. This pattern will guide you through creating a lovely bunny doll dressed in a cute outfit! The finished amigurumi bunny is approximately 30 cm (11.8 inches) tall.
Materials Needed:
- Yarn: YarnArt Jeans (55% cotton, 45% acrylic, 160 m/50 g) – less than one skein of main color and 1/3 skein of dress color
- Hook size: 2.0 mm
- Safety eyes: 5-8 mm
- Sewing needle and scissors
- Fiberfill for stuffing
- Abbreviations:
- mc: Magic circle
- ch: Chain
- sc: Single crochet
- dc: Double crochet
- st: Stitch
- sl st: Slip stitch
- inc: Increase (2 sc in the next stitch)
- dec: Decrease (single crochet 2 stitches together)
- BLO: Back loop only
- FLO: Front loop only
- F.o. Finish off
- (12): Number of stitches at the end of the row/round
- (…x6): Repeat whatever is inside the parentheses 6 times
Amigurumi Cute Bunny in Dress Free Pattern
Body:
- R 1: 6 sc in mc (6)
- R 2: (inc) x6 (12)
- R 3: (1 sc, inc) x6 (18)
- R 4: (2 sc, inc) x6 (24)
- R 5: (3 sc, inc) x6 (30)
- R 6: (4 sc, inc) x6 (36)
7-9. R 7-9: 36 sc (3 rows) - R 10: (16 sc, dec) x2 (34)
- R 11: (15 sc, dec) x2 (32)
- Change to dress color
- R 12: 32 sc
- R 13: BLO 32 sc
- R 14: (14 sc, dec) x2 (30)
- R 15: (13 sc, dec) x2 (28)
16-17. R 16-17: 28 sc (2 rows) - R 18: (12 sc, dec) x2 (26)
- R 19: (11 sc, dec) x2 (24)
20-21. R 20-21: 24 sc (2 rows) - R 22: (10 sc, dec) x2 (22)
- R 23: (9 sc, dec) x2 (20)
24-25. R 24-25: 20 sc (2 rows) - R 26: (8 sc, dec) x2 (18)
Sl st. F.o. and leave a long tail for sewing.
Skirt:
- With dress color:
- R 1: FLO 3 ch, 2 dc in every st to the end of row
- R 2: 3 ch, 2 dc in every st to the end of row
3-5. R 3-5: 1 dc in every st to the end of row - Reverse sc
F.o.
Head:
- R 1: 6 sc in mc (6)
- R 2: (inc) x6 (12)
- R 3: (1 sc, inc) x6 (18)
- R 4: (2 sc, inc) x6 (24)
- R 5: (3 sc, inc) x6 (30)
- R 6: (4 sc, inc) x6 (36)
- R 7: (5 sc, inc) x6 (42)
8-9. R 8-9: 42 sc (2 rows) - R 10: (6 sc, inc) x6 (48)
11-12. R 11-12: 48 sc (2 rows) - R 13: (7 sc, inc) x6 (54)
14-20. R 14-20: 54 sc (7 rows)
- Insert safety eyes between R 16 and R 17 at a distance of 10 st from each other.
- R 21: (7 sc, dec) x6 (48)
- R 22: (6 sc, dec) x6 (42)
- R 23: (5 sc, dec) x6 (36)
- R 24: (4 sc, dec) x6 (30)
- R 25: (3 sc, dec) x6 (24)
- R 26: (2 sc, dec) x6 (18)
Sl st. F.o.
Arms (make 2):
- R 1: 6 sc in mc (6)
- R 2: (inc) x6 (12)
- R 3: (1 sc, inc) x6 (18)
4-6. R 4-6: 18 sc (3 rows) - R 7: (4 sc, dec) x3 (15)
- R 8: (3 sc, dec) x3 (12)
- R 9: (2 sc, dec) x3 (9)
- Stuff with fiberfill until R 9.
10-21. R 10-21: 9 sc (12 rows) - Fold top of arm flat and 4 sc through both sides across.
F.o. and leave a long tail for sewing.
Legs (make 2):
- R 1: 6 sc in mc (6)
- R 2: (inc) x6 (12)
- R 3: (1 sc, inc) x6 (18)
- R 4: (2 sc, inc) x6 (24)
- R 5: 24 sc
- R 6: (11 sc, inc) x2 (26)
7-9. R 7-9: 26 sc (3 rows) - R 10: (11 sc, dec) x2 (24)
- R 11: (10 sc, dec) x2 (22)
- R 12: (9 sc, dec) x2 (20)
- R 13: 20 sc
- R 14: (8 sc, dec) x2 (18)
- R 15: 18 sc
- R 16: (7 sc, dec) x2 (16)
- R 17: 16 sc
- R 18: (6 sc, dec) x2 (14)
- R 19: 14 sc
- R 20: (5 sc, dec) x2 (12)
- R 21: 12 sc
- Stuff with fiberfill until R 21.
- R 22: (4 sc, dec) x2 (10)
23-35. R 23-35: 10 sc (13 rows)
- Fold top of leg flat and 5 sc through both sides across.
F.o. and leave a long tail for sewing.
Ears (make 2):
- R 1: 6 sc in mc (6)
- R 2: (1 sc, inc) x3 (9)
- R 3: (2 sc, inc) x3 (12)
- R 4: (3 sc, inc) x3 (15)
- R 5: (4 sc, inc) x3 (18)
6-16. R 6-16: 18 sc (11 rows) - R 17: (4 sc, dec) x3 (15)
- R 18: (3 sc, dec) x3 (12)
- R 19: (2 sc, dec) x3 (9)
- Don’t stuff with fiberfill.
- Fold top of ear flat and 4 sc through both sides across.
F.o. and leave a long tail for sewing.
Assembly:
- Sew the head to the body.
- Attach the arms on the seam between the head and body.
- Sew the legs to the body on R 9.
- Attach the ears on R 5 of the head.
Bow:
- Make a magic circle. Don’t pull off the magic circle.
- Make 7 ch, 4 dc, 7 ch and sl st in mc. The first part of the bow is ready.
- For the second part: Make 7 ch, 4 dc, 7 ch and sl st in mc. The second part of the bow is ready.
- Pull off the magic circle.
Enjoy your cute bunny in a dress!