Materials & Tools:
- Yarn:
- Himalaya Dolphin Baby Plush Yarn (1 skein)
- Hook: 4 mm
- Eyes for toys
- Spout for toys
- Toy filler
- Satin ribbon
- Needle for sewing details
- Scissors
Abbreviations:
- KA – amigurumi ring
- ss – connecting column
- sc – single crochet
- pr – increase
- ub – beauty
- (…) x n – repeat n times
Upper Fins (Make 2 Parts):
- Row 1: 6 sc in KA (6)
- Row 2: 6 inc (12)
- Row 3: (1 sc, inc) x 6 (18)
- Row 4: (2 sc, inc) x 6 (24)
- Rows 5-9: 24 sc
- Row 10: (3 sc, dec) x 4, at the end of the row there will be 4 sc – just knit them 4 sc (20)
- Row 11: 20 sc
- Row 12: (3 sc, dec) x 4 (16)
- Row 13: (2 sc, dec) x 4 (12)
- Row 14: 12 sc
Finishing:
- Fold in half and knit 6 sc for both edges.
Lower Flippers (Tail, Make 2 Parts):
- Row 1: 4 sc in KA (4)
- Row 2: 4 inc (8)
- Row 3: (1 sc, inc) x 4 (12)
- Row 4: 12 sc
- Row 5: (2 sc, inc) x 4 (16)
- Row 6: (3 sc, inc) x 4 (20)
- Row 7: 20 sc
- Row 8: (3 sc, dec) x 4 (16)
- Row 9: (2 sc, dec) x 4 (12)
- Row 10: (1 sc, dec) x 4 (8)
Finishing:
- Do not tie the edges together. Leave a margin for sewing and cut the thread.
Head:
- Stuff as you knit.
- Row 1: 6 sc in KA (6)
- Row 2: 6 inc (12)
- Row 3: (1 sc, inc) x 6 (18)
- Row 4: (2 sc, inc) x 6 (24)
- Row 5: (3 sc, inc) x 6 (30)
- Row 6: (4 sc, inc) x 6 (36)
- Rows 7-11: 36 sc
Insert the eyes (I inserted mine between rows 4 and 5, so that the beginning of the row was under the muzzle, and the distance between the eyes is 7 sc).
- Row 12: (4 sc, dec) x 6 (30)
- Row 13: (3 sc, dec) x 6 (24)
- Row 14: 24 sc
- Row 15: 6 sc, 6 dec, 6 sc (18) – this creates a raised head effect.
Do not cut the thread. Continue to knit the body.
Body:
- Stuff as you knit.
- Row 16: inc in each loop x 18 (36)
- Row 17: (5 sc, inc) x 6 (42)
- Row 18: (6 sc, inc) x 6 (48)
- Row 19: (7 sc, inc) x 6 (54)
- Rows 20-24: 54 sc
- Row 25: (7 sc, dec) x 6 (48)
- Rows 26-27: 48 sc
- Row 28: (6 sc, dec) x 6 (42)
- Row 29: 42 sc
- Row 30: (5 sc, dec) x 6 (36)
- Row 31: 36 sc
- Row 32: (4 sc, dec) x 6 (30)
- Rows 33-34: 30 sc
- Row 35: (3 sc, dec) x 6 (24)
- Rows 36-37: 24 sc
- Row 38: (2 sc, dec) x 6 (18)
- Rows 39-40: 18 sc
- Row 41: (1 sc, dec) x 6 (12)
- Rows 42-43: 12 sc
Finishing:
- Fold in half and sew horizontally with single crochets.
Muzzle (Nose):
- Knit the muzzle separately and sew it onto the head.
- Row 1: 6 sc in KA (6)
- Row 2: 6 inc (12)
- Row 3: (1 sc, inc) x 6 (18)
- Row 4: (2 sc, inc) x 6 (24)
- Row 5: 24 sc, 1 sl-st
Finishing:
- Leave the thread longer for sewing.
- Insert the nose in the middle between the 3rd and 4th rows.
Assembling the Toy:
- Sew the muzzle right under the eyes using a small amount of filler.
- Sew the upper flippers on the sides of the body (I sew mine counting 6 rows from the neck).
- Sew on the tail: Insert the tip of the body into one part of the tail and sew with the remaining thread, do the same on the other side.
- Tighten the muzzle.
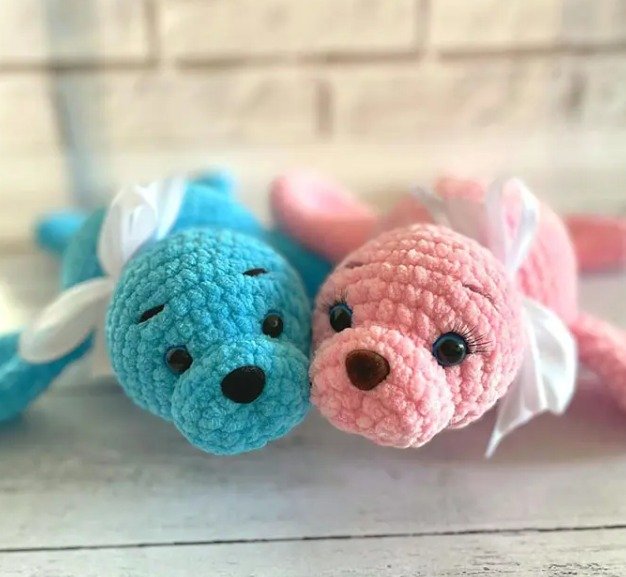
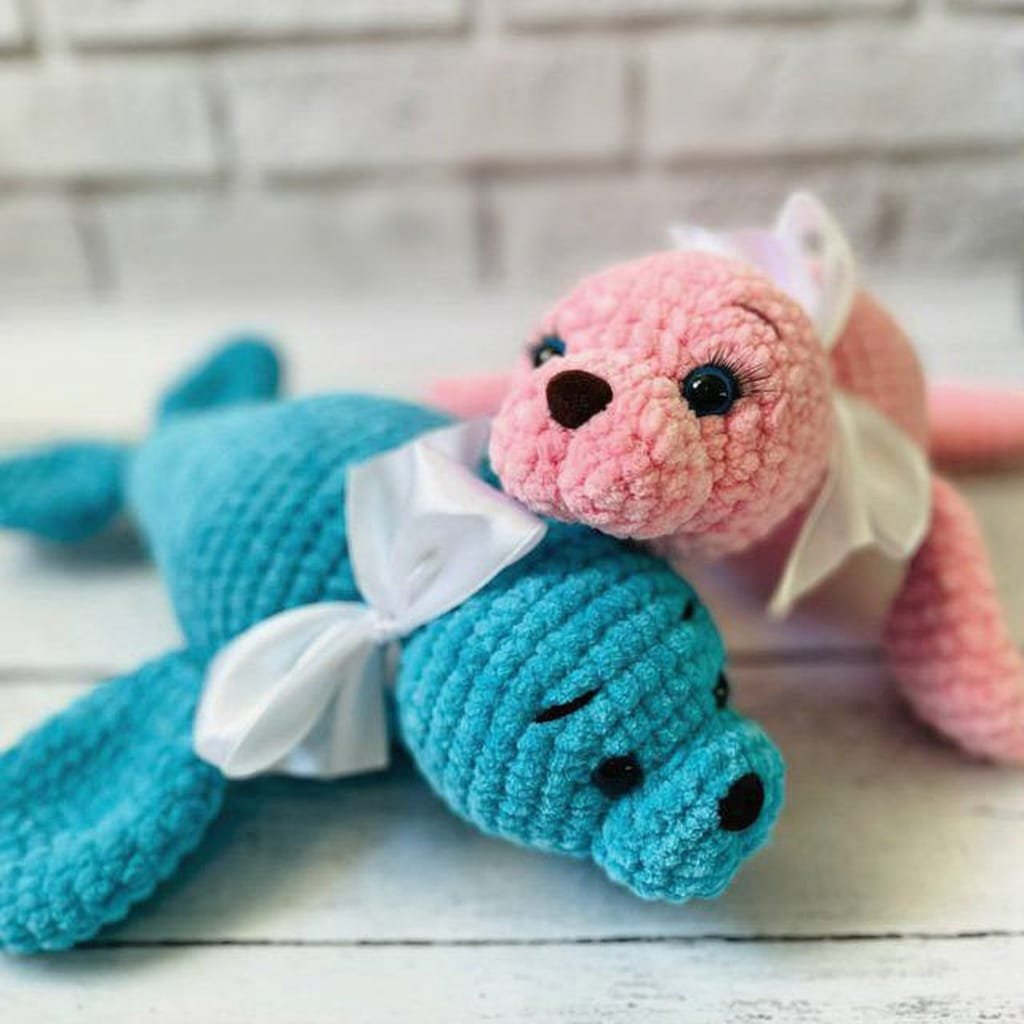
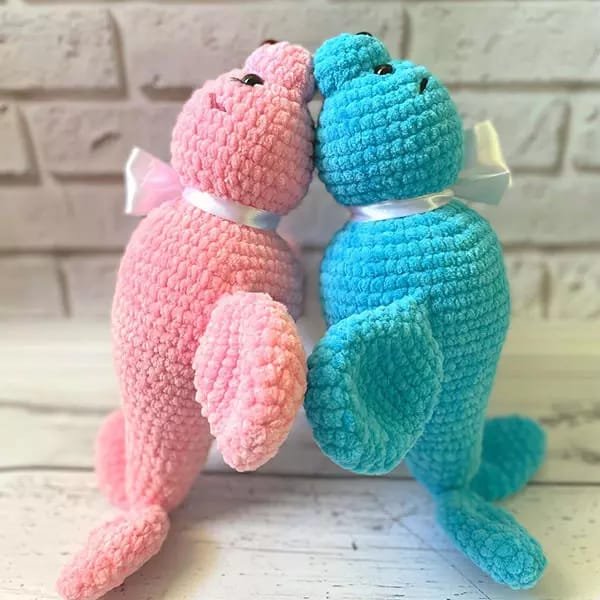
Optional: Feel free to add satin ribbon for an extra touch!
Feel free to share your finished seal on Instagram or Facebook and tag @freeamigurumii!
Happy crocheting and enjoy making your cute seal!