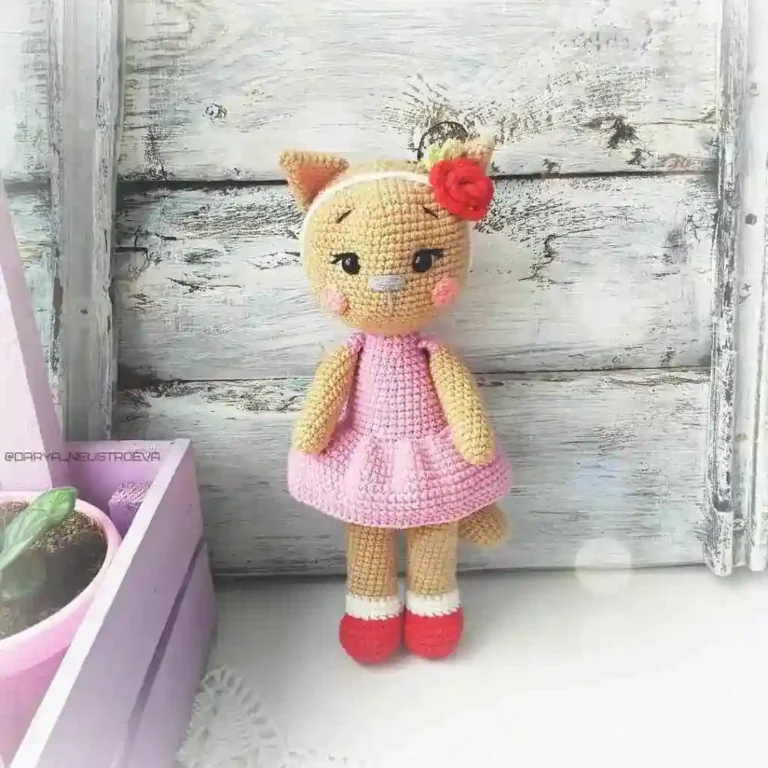
Free Amigurumi Tutorial: How to Crochet Plush Kittens by Irina Maslova (@_plush_soft_toys)
In this tutorial, you can learn how to crochet plush kittens using the amigurumi technique. You’ll need any plush yarn and an appropriate crochet hook. The body and head are crocheted as one piece, while the ears are made separately and sewn on. The face requires some shaping, and if desired, you can add whiskers made of wire. You can also embellish the kitten with a decorative button or a little fish-shaped figurine.
Materials and Tools
- Plush yarn
- Embroidery thread
- Crochet hook (4-4.5 mm)
- 16 mm safety eyes
- Nose for toys
- Toy stuffing
- Stitch markers
- Pins
- Whisker wire
- Needle for sewing parts together
- Scissors
Abbreviations
KA – Magic ring
VP – Chain stitch
PS – Slip stitch
SS – Single crochet
PR – Increase
UB – Decrease
PPP – Front loop
(…) x n — Repeat n times
Crochet Amigurumi Kitten Pattern
Body and Head
Start by marking the back center of the body. If necessary, make a slip stitch. Begin crocheting using the main color yarn.
- 8 SC in KА
- 8 increases (16)
- 2 SC, 4 increases, 4 SC, 4 increases, 2 SC (24)
- 2 SC, (1 SC, 1 increase) x 4, 4 SC, (1 SC, 1 increase) x 4, 2 SC (32)
- 10 SC, paw: 1 puff stitch (4 DC in one stitch and join at the top), 10 SC, paw: 1 puff stitch (4 DC in one stitch and join at the top), 10 SC, tail (11 CH, from the 2nd CH: 3 DC, 3 SC, 4 HDC) (32)
6-8. 3 rows of 32 SC - 7 SC, 1 decrease, 14 SC, 1 decrease, 7 SC (30)
- (3 SC, 1 decrease) x 2, 2 SC, paw: 1 puff stitch (4 HDC in one stitch and join at the top), 1 decrease, 2 SC, paw: 1 puff stitch (4 HDC in one stitch and join at the top), 1 decrease, (3 SC, 1 decrease) x 2 (24)
- (2 SC, 1 decrease) x 6 (18)
- (1 SC, 1 decrease) x 6 (12)
Continue crocheting with the main color. If you’d like to highlight the face, crochet rows 13-17 using an additional color.
- Front loop only: 12 increases (24)
- (1 SC, 1 increase) x 12 (36)
15-17. 3 rows of 36 SC - 9 SC, (1 SC, 1 decrease) x 6, 9 SC (30)
19-21. 3 rows of 30 SC - (3 SC, 1 decrease) x 6 (24)
Insert the 16 mm safety eyes between rows 19 and 20. Leave 3-4 SC between the eyes.
- (2 SC, 1 decrease) x 6 (18)
- 9 decreases
Pull the hole closed with a needle and thread.
Ears (2 parts)
Crochet back-and-forth. Start by making 8 CH, then crochet from the 2nd chain: 7 SC, 1 CH.
- From the 2nd chain: 1 decrease, 3 SC, 1 decrease, 1 CH (5)
- From the 2nd chain: 1 decrease, 1 SC, 1 decrease, 1 CH (3)
- From the 2nd chain: 1 triple decrease (1)
Fix the yarn and cut it. Leave 20-30 cm of yarn for sewing the ears to the head. Thread the remaining yarn down using a needle.
Shaping the Face (Embroidering)
To create facial features, use the needle to create indents. Use the following path: T3, T1, T2, T4. Make a slight indent, tying two knots. Repeat the process using another thread: T5, T6. Tie the thread in two knots again, hiding the ends in the head.
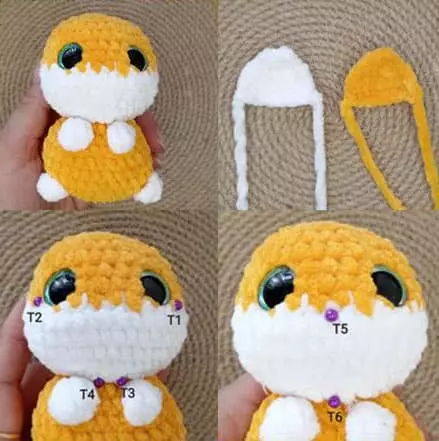
Sew the ears between rows 18 and 22, leaving 4 SC between them. Embroider the white part of the eyes, eyelids, eyebrows, and the nose bridge in the center of the face. Attach the nose.
Your Cute Kitten is Ready!
Congratulations! Your adorable crochet kitten is now complete. Don’t forget to tag the author on social media at @_plush_soft_toys to share your work.
This tutorial is perfect for beginner and intermediate crocheters, and it’s a fun project to work on during any season! Happy crocheting!