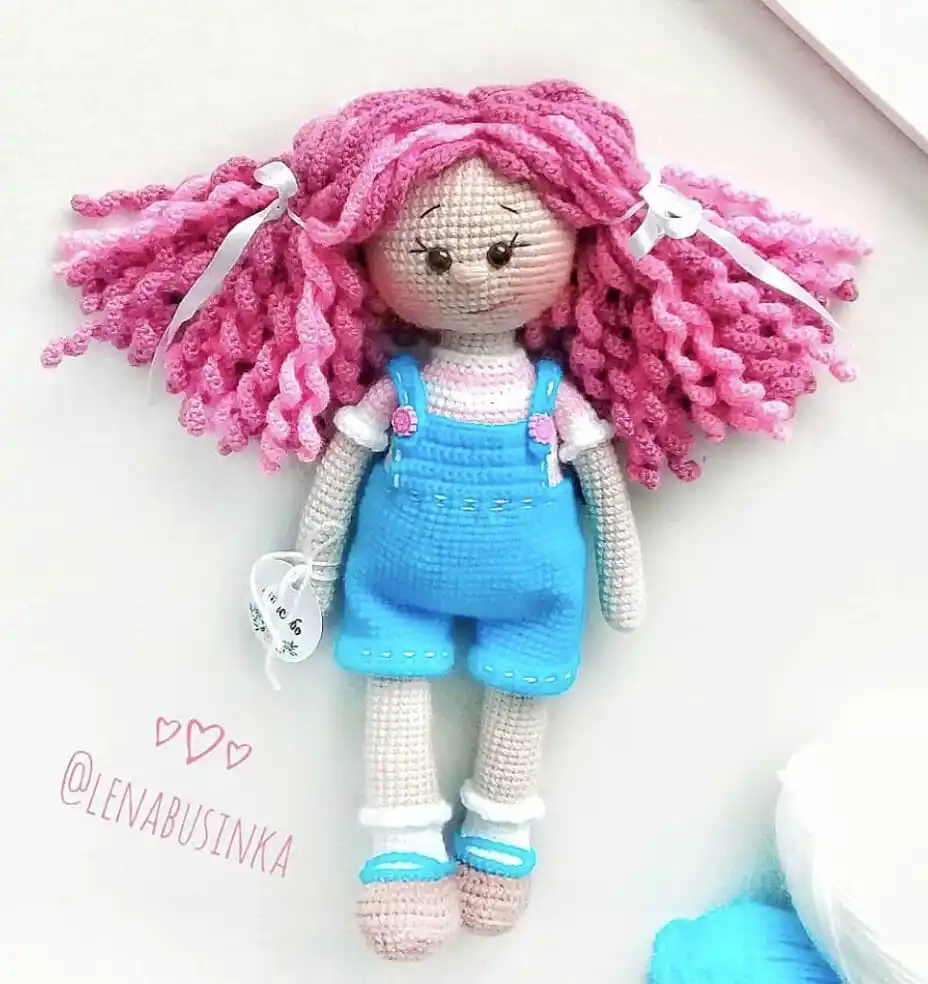
Free Masterclass on Crocheting Curly Sue by Lena Bусинка (@lenabusinka18)
With this description, you can crochet the doll “Curly Sue” in a romper using a hook. The masterclass also includes a crochet diagram for the sundress. Any acrylic, cotton, or half-cotton yarn and an appropriate hook can be used for amigurumi.
The finished toy is about 27 cm in size.
Materials and Tools:
- Yarn: Pexorka Детская Новинка
- Hook: 2 mm
- Toy eyes
- Toy filler
- Dry pastel or blush
- Needle for attaching parts
- Scissors
Everything needed can be purchased here.
Abbreviations:
- KA: magic ring
- ch: chain stitch
- slst: slip stitch
- sc: single crochet
- dc: double crochet
- hdc: half double crochet
- inc: increase
- dec: decrease
- (…) x n: repeat n times
Description of Crochet Pattern for Curly Sue:
Head:
- 6 sc in KA (6)
- (inc) x 6 (12)
- (sc, inc) x 6 (18)
- (2 sc, inc) x 6 (24)
- (3 sc, inc) x 6 (30)
- (4 sc, inc) x 6 (36)
- (5 sc, inc) x 6 (42)
- (6 sc, inc) x 6 (48)
- (7 sc, inc) x 6 (54)
- 54 sc
- (8 sc, inc) x 6 (60)
12-13. 60 sc (2 rows) - (9 sc, inc) x 6 (66)
15-19. 66 sc (5 rows) - (9 sc, dec) x 6 (60)
21-22. 60 sc (2 rows)
Insert eyes on a secure fastening between rows 18 and 19, spaced 6 sc apart.
- (8 sc, dec) x 6 (54)
- 54 sc
- (7 sc, dec) x 6 (48)
- (6 sc, dec) x 6 (42)
- (5 sc, dec) x 6 (36)
- (4 sc, dec) x 6 (30)
- (3 sc, dec) x 6 (24)
- (2 sc, dec) x 6 (18)
Arms (2 parts):
- 6 sc in KA (6)
- (inc) x 6 (12)
3-22. 12 sc (20 rows)
Change color - 12 sc
- For the front loop: ch 3, 2 slst, repeat until the end of the row (edging)
- For the back loop, 24 rows (color change optional) 12 sc
26-30. 12 sc (5 rows)
Sew together, cut the yarn, leaving enough to attach.
Legs (2 parts):
Start with the color of the shoes
- Ch 7, starting from the second ch from the hook: 5 sc, 3 sc in the last ch, on the other side of the chain: 4 sc, inc
- inc, 4 sc, (inc) x 3, 4 sc, (inc) x 2 (20)
- sc, inc, 5 sc, inc, 3 sc, inc, 5 sc, inc, 2 sc (24)
- 2 sc, inc, (5 sc, inc) x 3, 3 sc (28)
- (sc, inc) x 2, 5 sc, inc, sc, inc, 3 sc, inc, sc, inc, 5 sc, inc, sc, inc, 2 sc (36)
- For the back loop: 36 sc
7-8. 36 sc (2 rows) - 9 sc, dec, (sc, dec) x 5, 8 sc, dec (29)
Change color (for socks) - For the back loop: 8 sc, (dec) x 2, 3 sc, (dec) x 2, 8 sc, dec (24)
- 8 sc, (dec) x 4, 8 sc (20)
- 6 sc, dec, 4 sc, dec, 6 sc (18)
13-17. 18 sc (5 rows) - For the front loop: ch 3, 2 slst, repeat until the end of the row (edging)
Change color (body color) - For the back loop: 18 sc for 18 rows
20-44. 18 sc (25 rows)
Cut the yarn.
Body:
- Join the yarn for the first leg with the color of the shorts, crochet 9 sc on both sides, 5 ch, then on the second leg, crochet 9 sc on both sides.
The start of the row will be at the seam. - 9 sc on one side of the leg chain, 5 sc on one side between the legs, 9 sc on the other side of the second leg, 9 sc on the other side, 5 sc, 9 sc (46)
- (23 sc, inc) x 2 (48)
- (7 sc, inc) x 6 (54)
5-16. 54 sc (12 rows) - (7 sc, dec) x 6 (48)
- (6 sc, dec) x 6 (42)
19-28. 42 sc (10 rows) - (5 sc, dec) x 6 (36)
- (4 sc, dec) x 6 (30)
- (3 sc, dec) x 6 (24)
Change color to skin color - For the back loop: (2 sc, dec) x 6 (18)
33-36. 18 sc
Cut the yarn, leaving enough to attach the head.
Wig:
- 6 sc in KA (6)
- (inc) x 6 (12)
- For the back loop: (sc, inc) x 6 (18)
- (2 sc, inc) x 6 (24)
- For the back loop: (3 sc, inc) x 6 (30)
- (4 sc, inc) x 6 (36)
- For the back loop: (5 sc, inc) x 6 (42)
- (6 sc, inc) x 6 (48)
- For the back loop: (7 sc, inc) x 6 (54)
- (8 sc, inc) x 6 (60), slst
Next, begin crocheting the first lock, chain 60, and crochet all sc from the second ch from the hook. The length of the lock depends on the number of chains you make. The lock can be made with sc, slst, or dc, depending on the desired twist.
After completing the first lock, slst into the next stitch of the round, then into the next stitch, and repeat until the end of the row. The next row is worked into the front loops of row 9. Crochet similarly, adjusting the chain length for each lock.
Romper:
Start with the pants. Chain 30 ch, join into a circle.
1-10. 30 sc around (10 rows)
For the second pant leg, crochet the same way, but do not cut the yarn. Continue crocheting the romper, crocheting 5 ch from the second pant leg and joining with the first leg using slst.
- 30 sc for the first pant leg, 5 sc for the 5 ch chain, 30 sc for the second pant leg, 5 sc for the other side of the chain (70)
- Add 2 increases at the sides (72)
13-23. 72 sc (11 rows) - (10 sc, dec) x 6 (66)
- (9 sc, dec) x 6 (60)
26-27. 60 sc (2 rows) - Add 2 decreases at the sides (58)
29-30. 58 sc (2 rows)
Fasten with slst. Cut the yarn.
Find the center of the romper, join the yarn, crochet 18 sc, and crochet 8 rows back and forth with 18 sc.
Straps (2 parts):
Chain 25, crochet 1 row of hdc, sew to the romper. Hide the yarn ends and decorate (I added a decorative stitch and folded the pant legs).
Sundress:
- Chain 52, join into a circle.
2-4. 52 sc (3 rows) - Ch 2, (3 dc, inc) x 13 (65), slst
- Ch 2, (4 dc, inc) x 13 (78), slst
7-11. 78 sc (5 rows) - sc, hdc, 2 dc, hdc, sc…
Repeat until the end of the row.
Assembly of the Toy:
Sew the head to the body. Sew the arms between the second and third rows from the neck. Sew the wig. Crochet the shoes using the front loops. Embroider the nose, mouth, eyelashes, and eyebrows. Paint the cheeks with dry pastel. Dress and decorate.