Hello amigurumi lovers and beautiful visitors, I wanted to share the free amigurumi patterns for you here. In my article, I will share 1 pattern and how to make it for you. At the end of my article, I will share amigurumi patterns that can generate ideas for you.
Materials
- Yarn: Medium weight yarn (worsted, aran, or 10-ply) (Paintbox Yarns Cotton Aran)
- Color A: Head, body, & wings
- Color B: Shirt
- Color C: Beak, legs, & feet
- Hook: 2.75mm (C) hook (Clover Amour)
- Toy stuffing (Fairfield Poly-Fil)
- Stitch markers (Clover Quick Locking Stitch Markers Small)
- Embroidery floss in black for face (DMC Embroidery Floss in black)
- Embroidery needle (DMC Embroidery Needles)
- Tapestry needle (DMC Tapestry Needle Size 16)
- Scissors (Gingher Stork Scissors)
- Optional: water-soluble marking pen for drawing on your face before embroidering (Wrights Water Soluble Marking Pen)
- Optional: pink blush and brush or cotton bud for cheeks
Finished Size
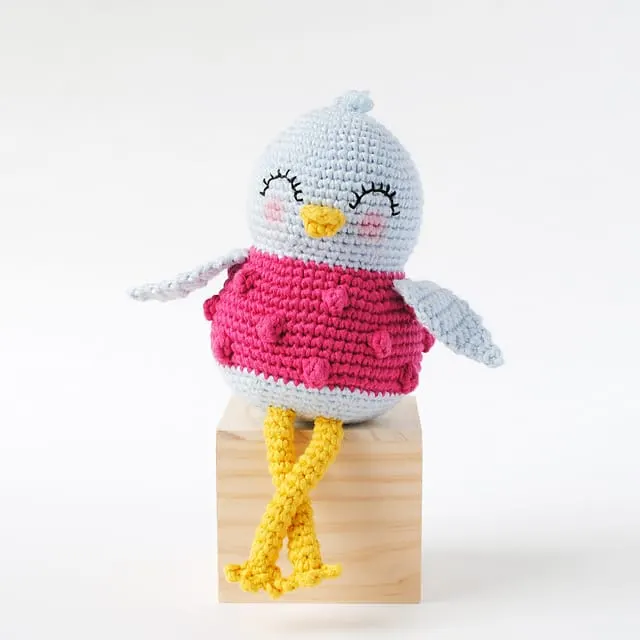
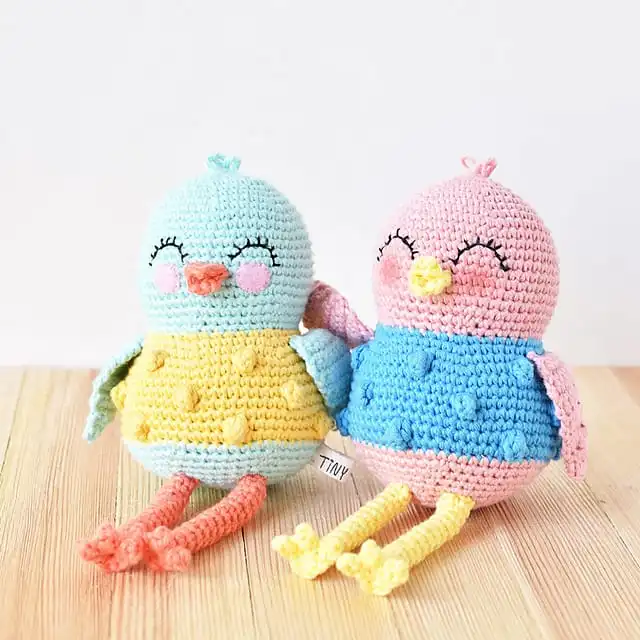
The finished height of Sweet Bird is 8.5 inches. Keep your tension tight and consistent to avoid stuffing showing through.
You can also use lightweight yarn and a size 2.25mm crochet hook to make a smaller Sweet Bird amigurumi. The finished height of this combo is 7 inches. Check out this blog post to learn more about changing your yarn and hook to make different sized amigurumi!
Stitches & Abbreviations (US Terminology)
- ch – chain
- dec – single crochet decrease
- hdc – half double crochet
- inc – single crochet increase
- inv dec – invisible decrease
- rnd(s) – round(s)
- sc – single crochet
- sl st – slip stitch
- st(s) – stitch(es)
- 3-dc pc st – 3 double crochet popcorn stitch
[ ] – Repeat steps between brackets for the specified number of times
( ) – The number of stitches you should have at the end of each round
Special Techniques
- 3-dc popcorn stitch – See photo tutorial below.
- Changing color – Take the last yarn over of previous stitch with new color. Continue working with new color.
- Embroidering on crochet – See tutorial here.
- Finish off – Watch tutorial here.
- Invisible decrease – Watch tutorial here.
- Magic ring – Watch tutorial here.
- Standing sc – Start with a slipknot on your hook. Insert hook into stitch and make a single crochet as normal. See tutorial here.
Notes
- All sections are worked in a continuous round, except wings which are worked in rows.
- Mark the beginning of each round with a stitch marker.
- All stitches are written in US terminology.
- Demonstration photos are shown using right-handed crochet.
3-Double Crochet Popcorn Stitch
- Make 3 dcs into stitch. Drop loop of last dc from hook, leaving it open above stitch.
- Insert hook through top of first dc.
- Place dropped loop on hook.
- Bring loop through first dc.
- Ch 1.
- Fold popcorn stitch towards you when doing your next st so the popcorn stays on the outside of your bird and to ensure a tight stitch.
- In the following round, make sure to sc in the ch st under each popcorn st.
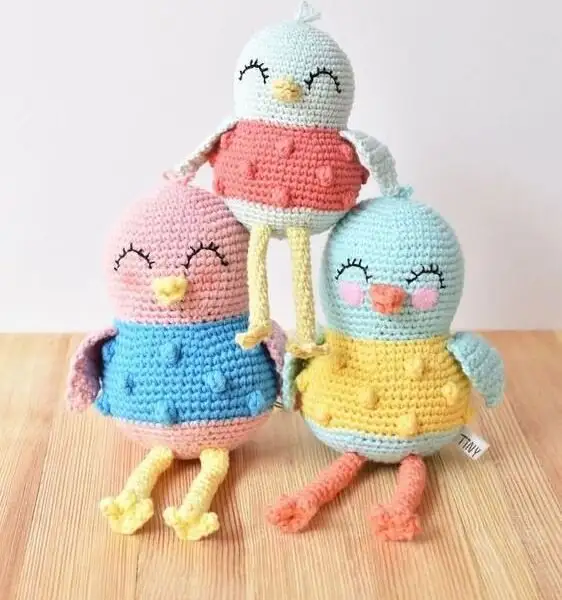
Sweet Bird Amigurumi Pattern
Beak
rnd 1: In color C, ch 6, sc 3 in 2nd ch from hook, sc 3 down chain, sc 3 in last ch, turn to crochet down other side of chain (and over yarn tail to avoid weaving), sc 3 down chain (12 sts)
Sl st 1 into next st. Fasten off, leaving a 15-inch tail for attaching. Weave in and cut beginning yarn tail. Set aside until after head is made.
Head
rnd 1: In color A (leave a 15-inch starting yarn tail outside of the top of head for head feathers), start with a magic ring, sc 6 into ring (6 sts)
rnd 2: Inc 6 (12 sts)
rnd 3: [sc 1, inc 1] 6 times (18 sts)
rnd 4: [sc 1, inc 1, sc 1] 6 times (24 sts)
rnd 5: [sc 3, inc 1] 6 times (30 sts)
rnd 6: Sc around (30 sts)
rnd 7: [sc 2, inc 1, sc 2] 6 times (36 sts)
rnd 8: [sc 5, inc 1] 6 times (42 sts)
rnd 9: [sc 3, inc 1, sc 3] 6 times (48 sts)
rnds 10-18: Sc around (48 sts for 9 rnds)
rnd 19: [sc 6, inv dec 1] 6 times (42 sts)
rnd 20: [sc 5, inv dec 1] 6 times (36 sts)
Fasten off yarn and weave in ending yarn tail. Attach beak, embroider face, and make head feathers now using the photo tutorials below.
Attaching The Beak & Embroidering Face
- Thread tapestry needle and bring yarn to the center of oval.
- Stitch inner sides of oval together (1 stitch per side).
- This is what your finished beak should look like.
Continue following the steps and photos provided in the tutorial to finish the Sweet Bird amigurumi!
Finished
I hope you enjoyed this bird amigurumi crochet pattern! Feel free to tag me (@freeamigurumii) in your photos on Instagram or Facebook if you’d like!